
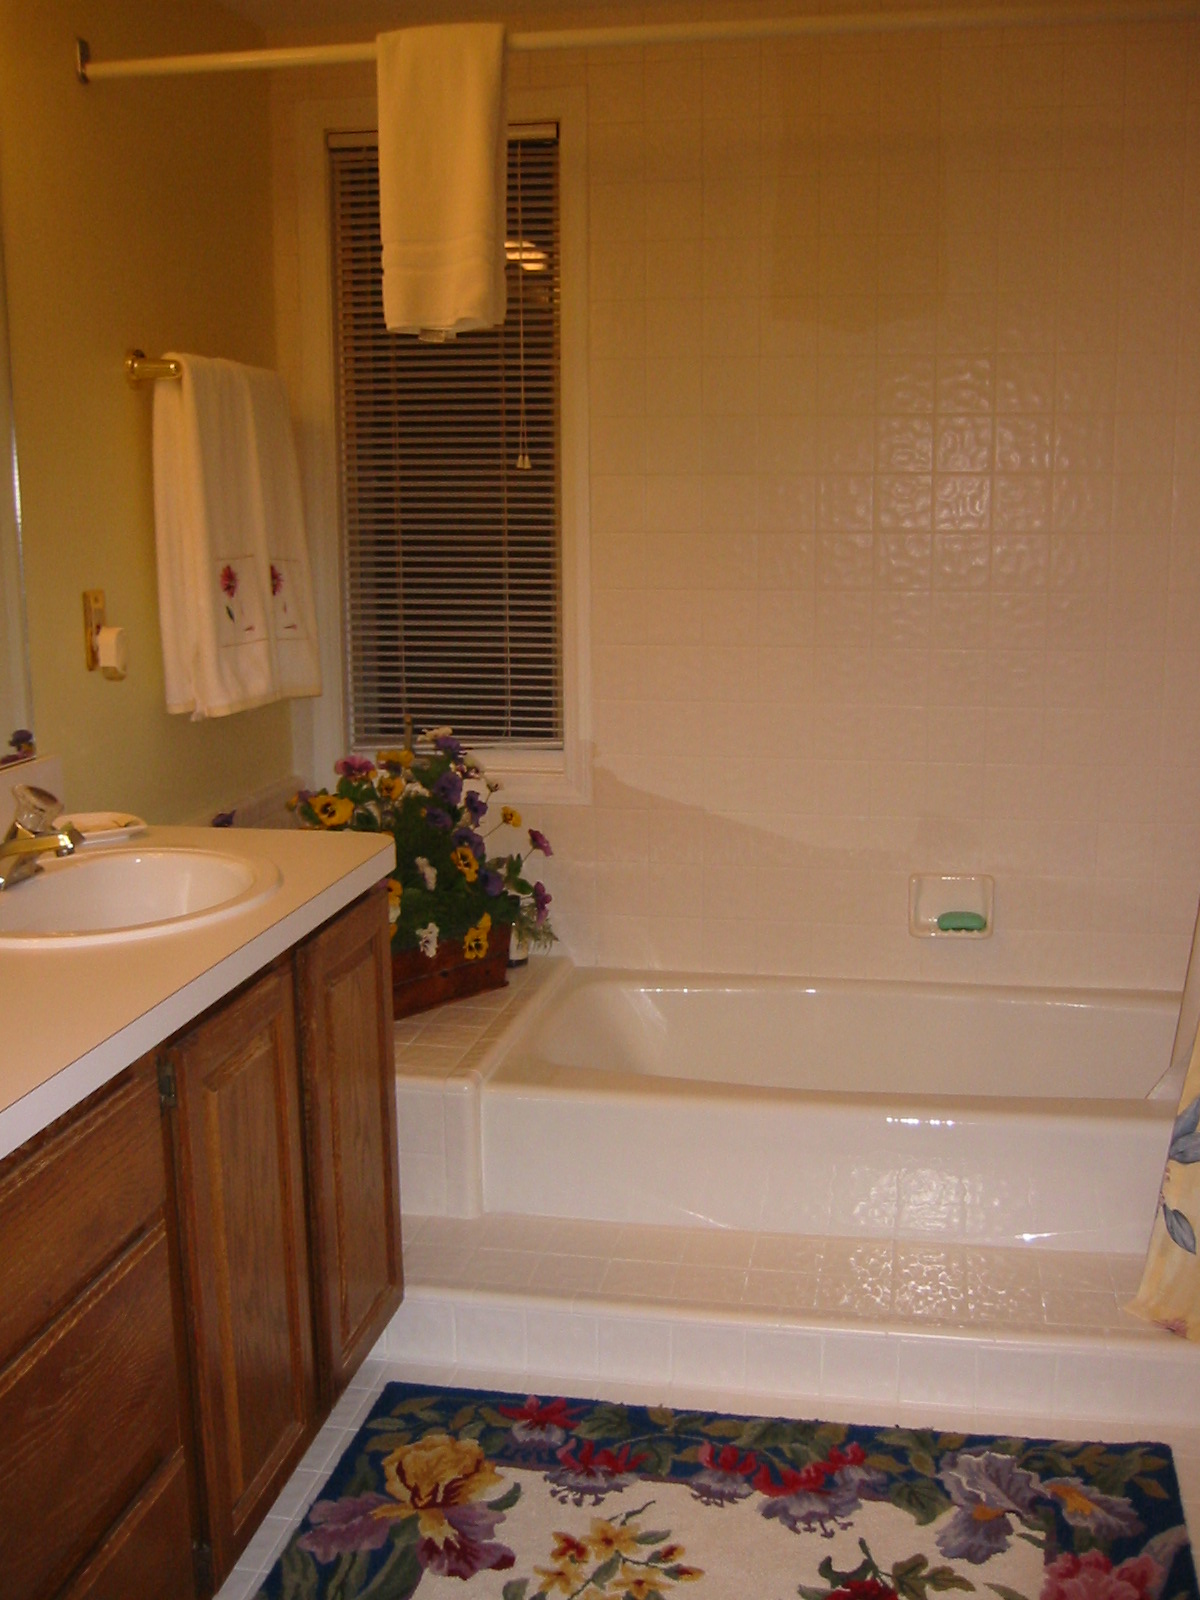


BEFORE | DURING | AFTER
Taking on a main bathroom remodel can be daunting. It’s difficult enough to make decisions regarding design and functionality, but the displacement of not having this bathroom available to the family during the renovation could possibly put off anyone seeking to undertake the project in the first place.
This bathroom remodel is for a mother and grade school daughter. The parents both get ready at the same time in the morning, so the mother is with the daughter and the father is in the master bathroom as it only has one sink.
The main bathroom remodel required that the design be functional for both a child and for the adult. In the end, it needed to serve the growing child, but not be too “girlie” for the mother. A timeless, clean design was in order.
There were very specific design choices for this project:
- Cutouts that hold shampoo/conditioner and soap in the shower for each of the users – and one at a height that the child could reach now.
- A personal shower was installed with a hand-held showerhead to help rinse the daughter’s hair more easily.
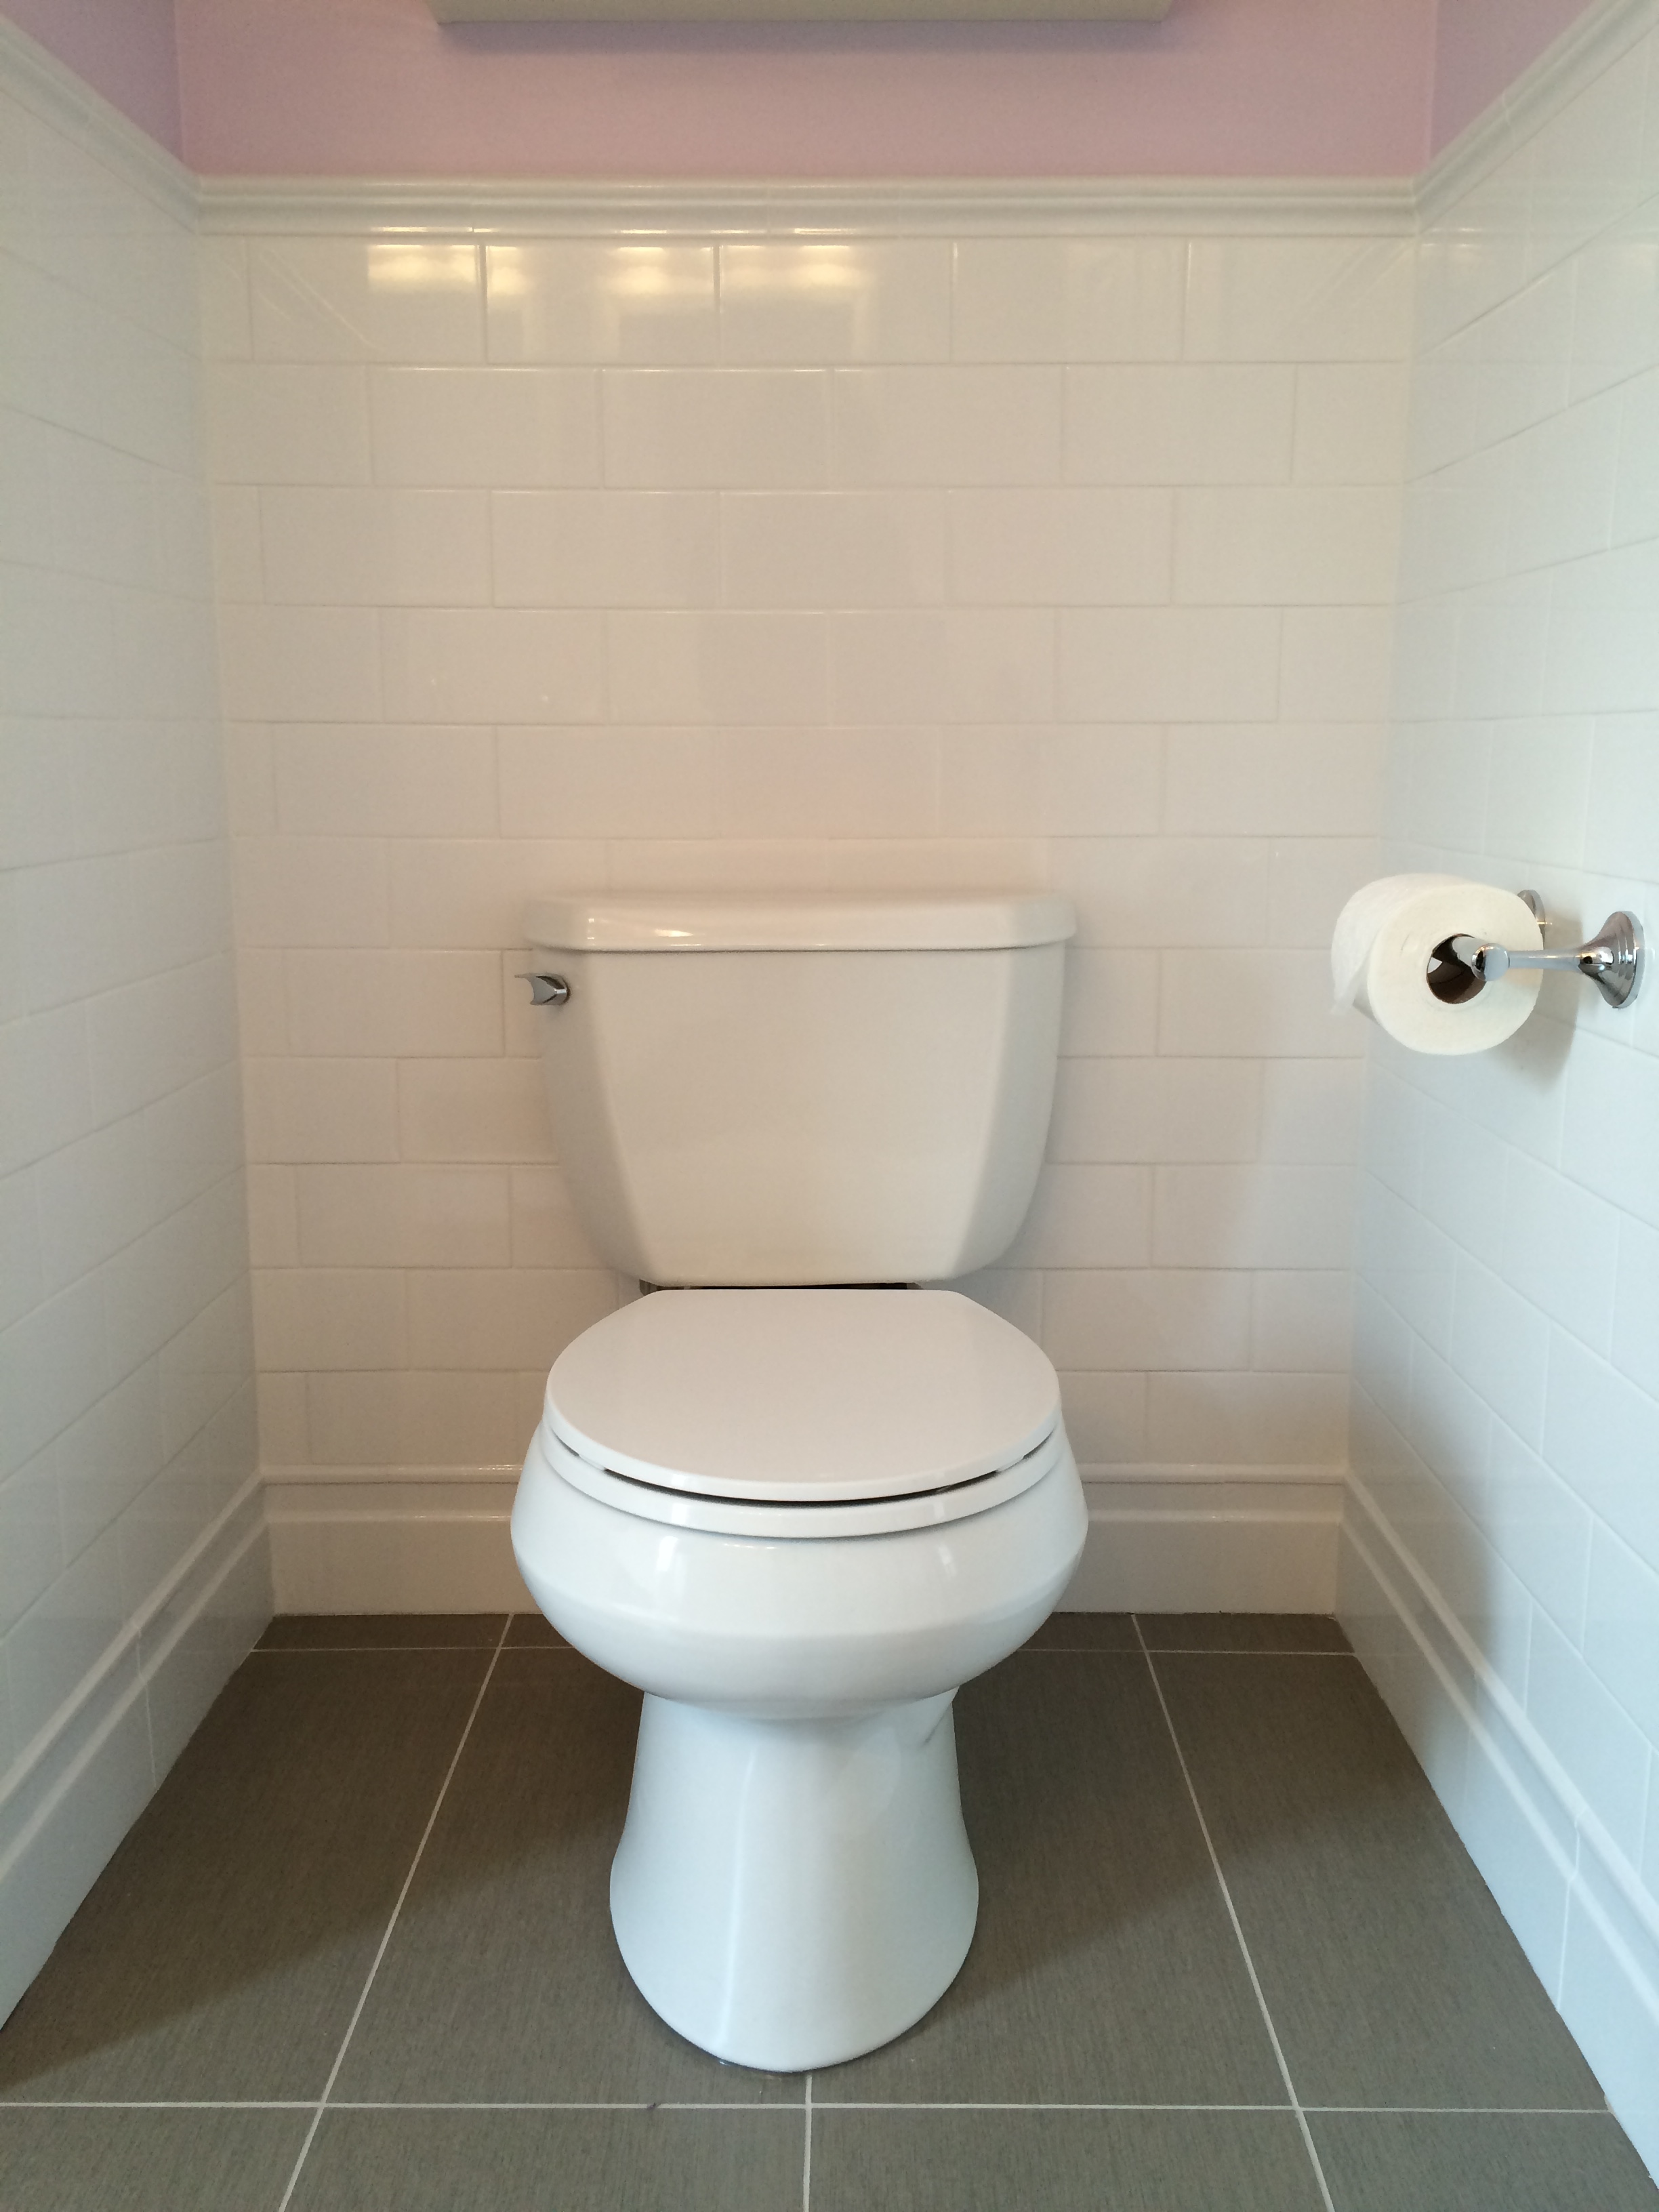
- A toilet was selected so the child could reach it by herself, but not too small or low that it would look odd in the space.
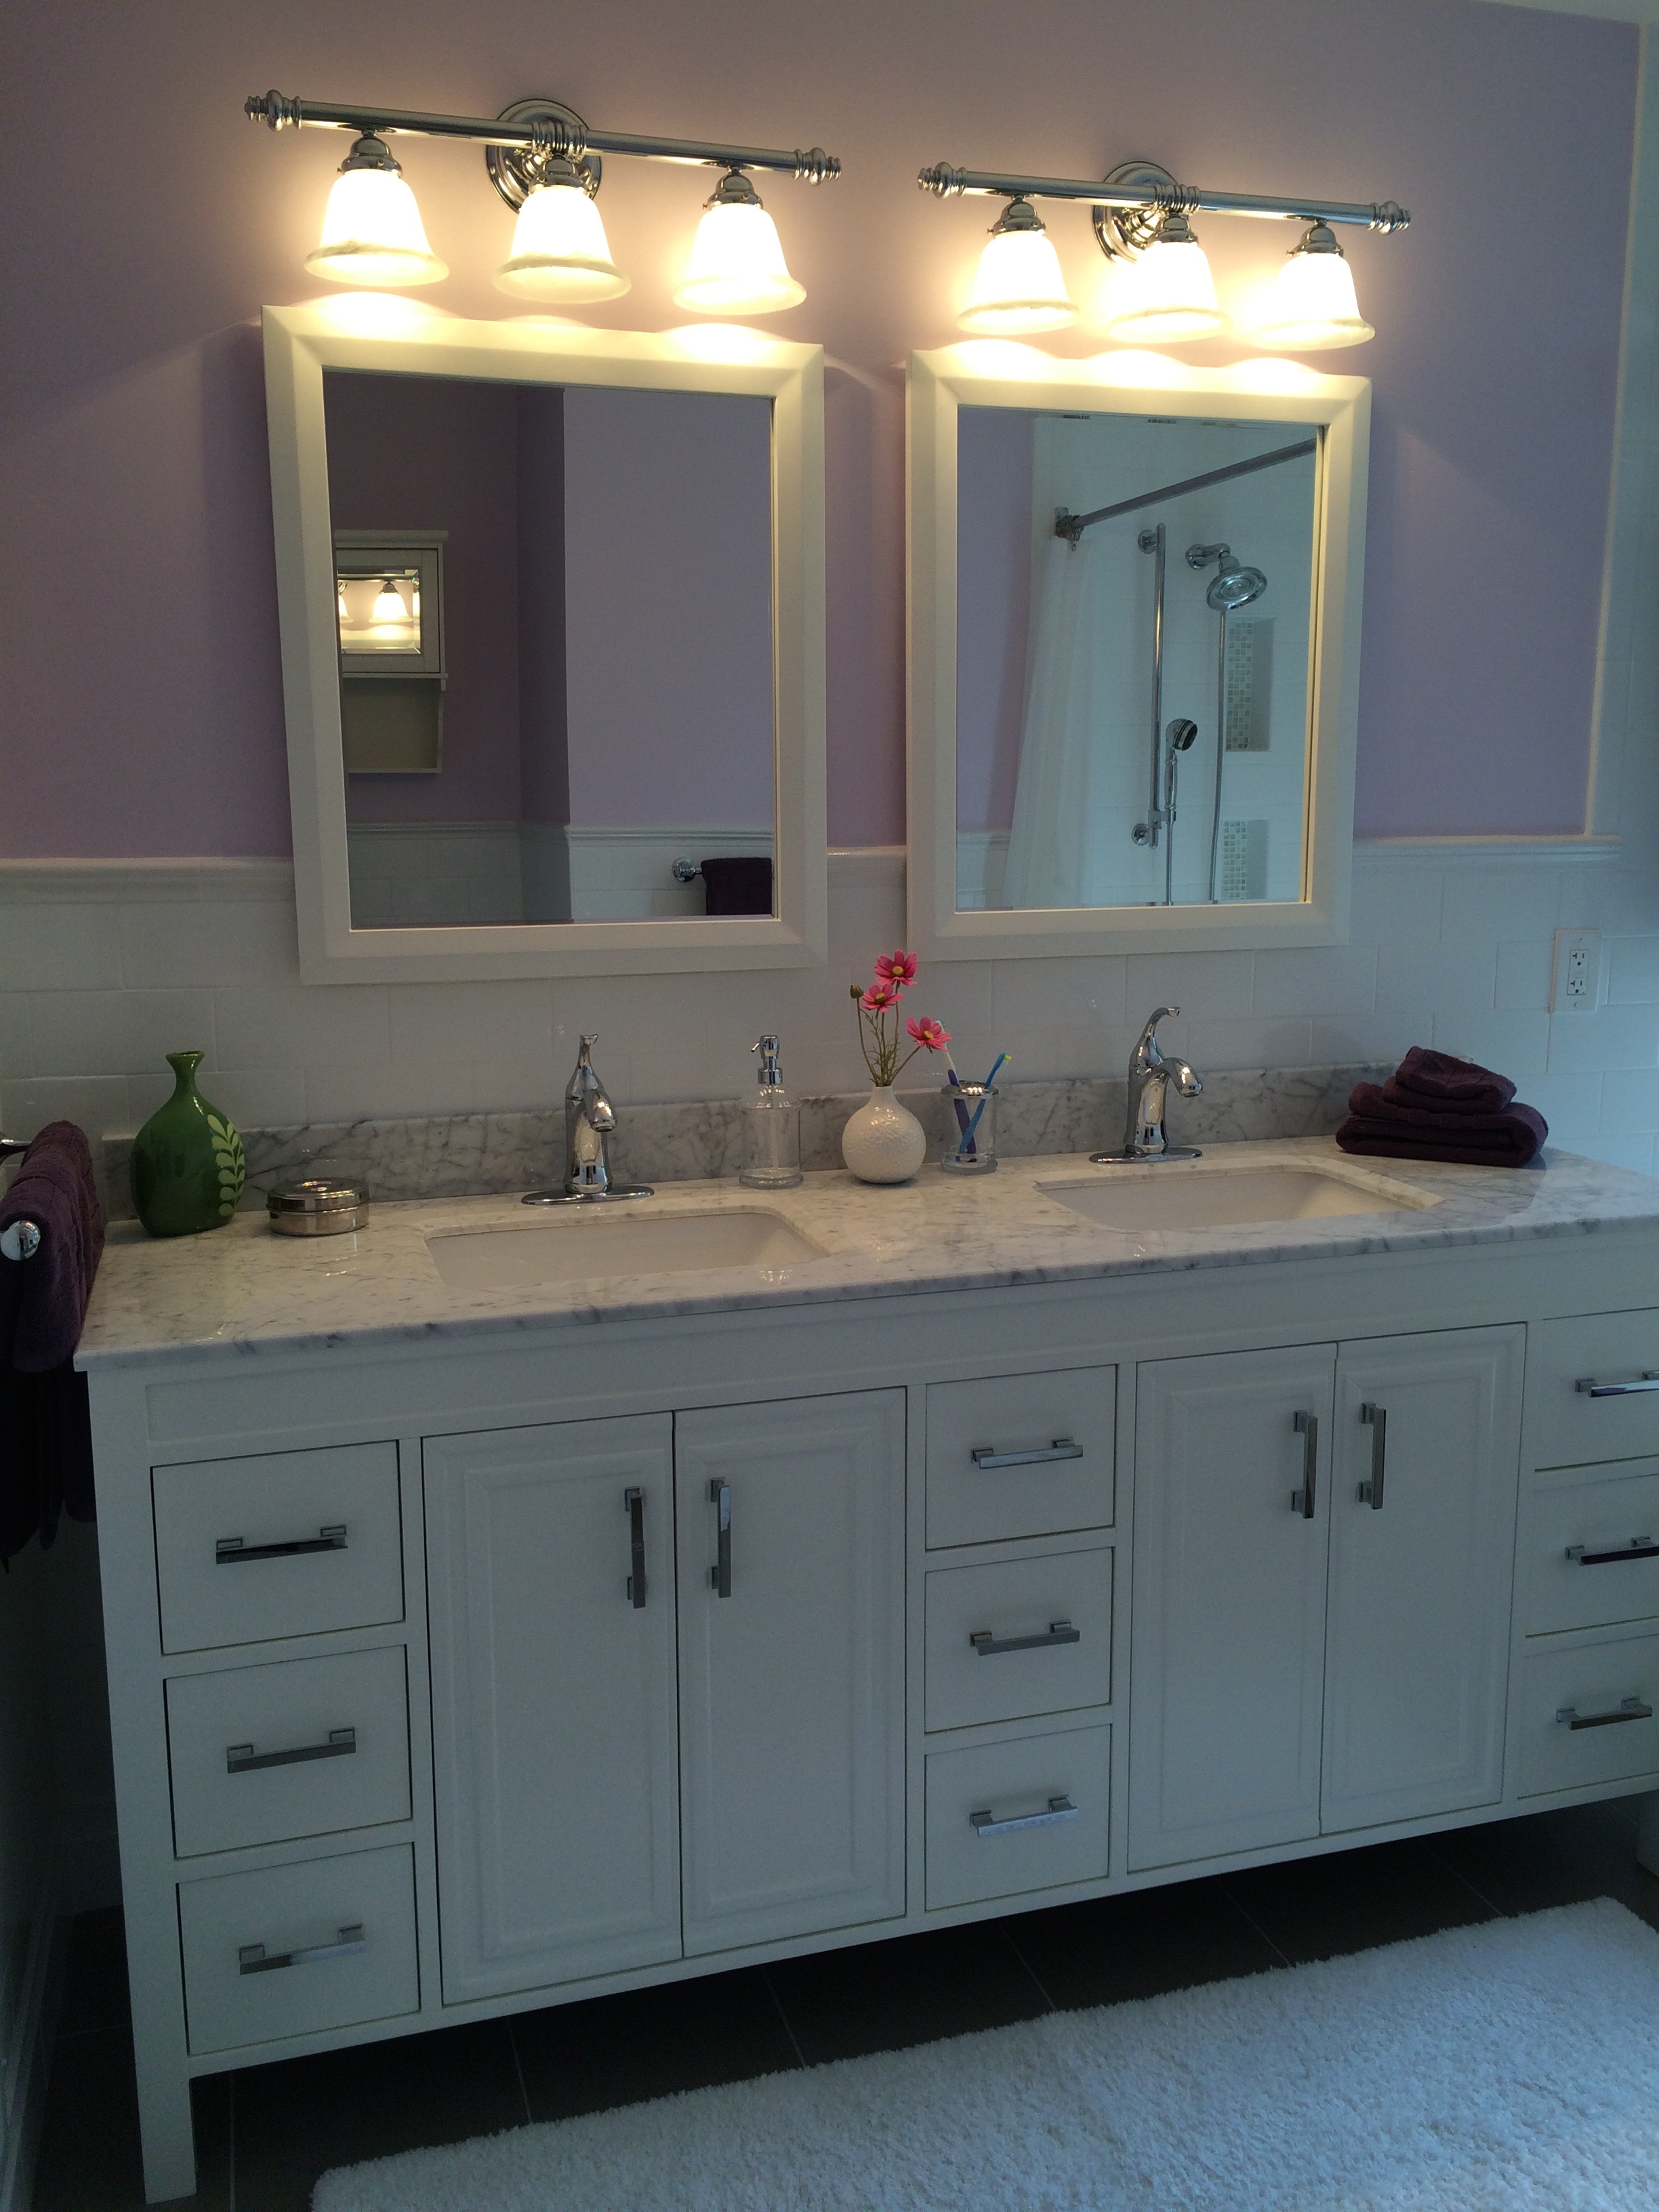
- Double sinks were a must so they could get ready at the same time.
- Having an adequate number of towel rods to accommodate multiple users was required.
- A new mirrored medicine cabinet would be installed to keep medication away from small hands.
- Good lighting – and an ability to dim the lights in the evening, in case the little one needs to get up in the middle of the night and use the bathroom.
- Radiant-heated floors were considered with the cold Michigan winters, but ruled out due to limitations in available circuits in the electrical box and what it would take to run a dedicated line.
Everything was considered in this renovation.
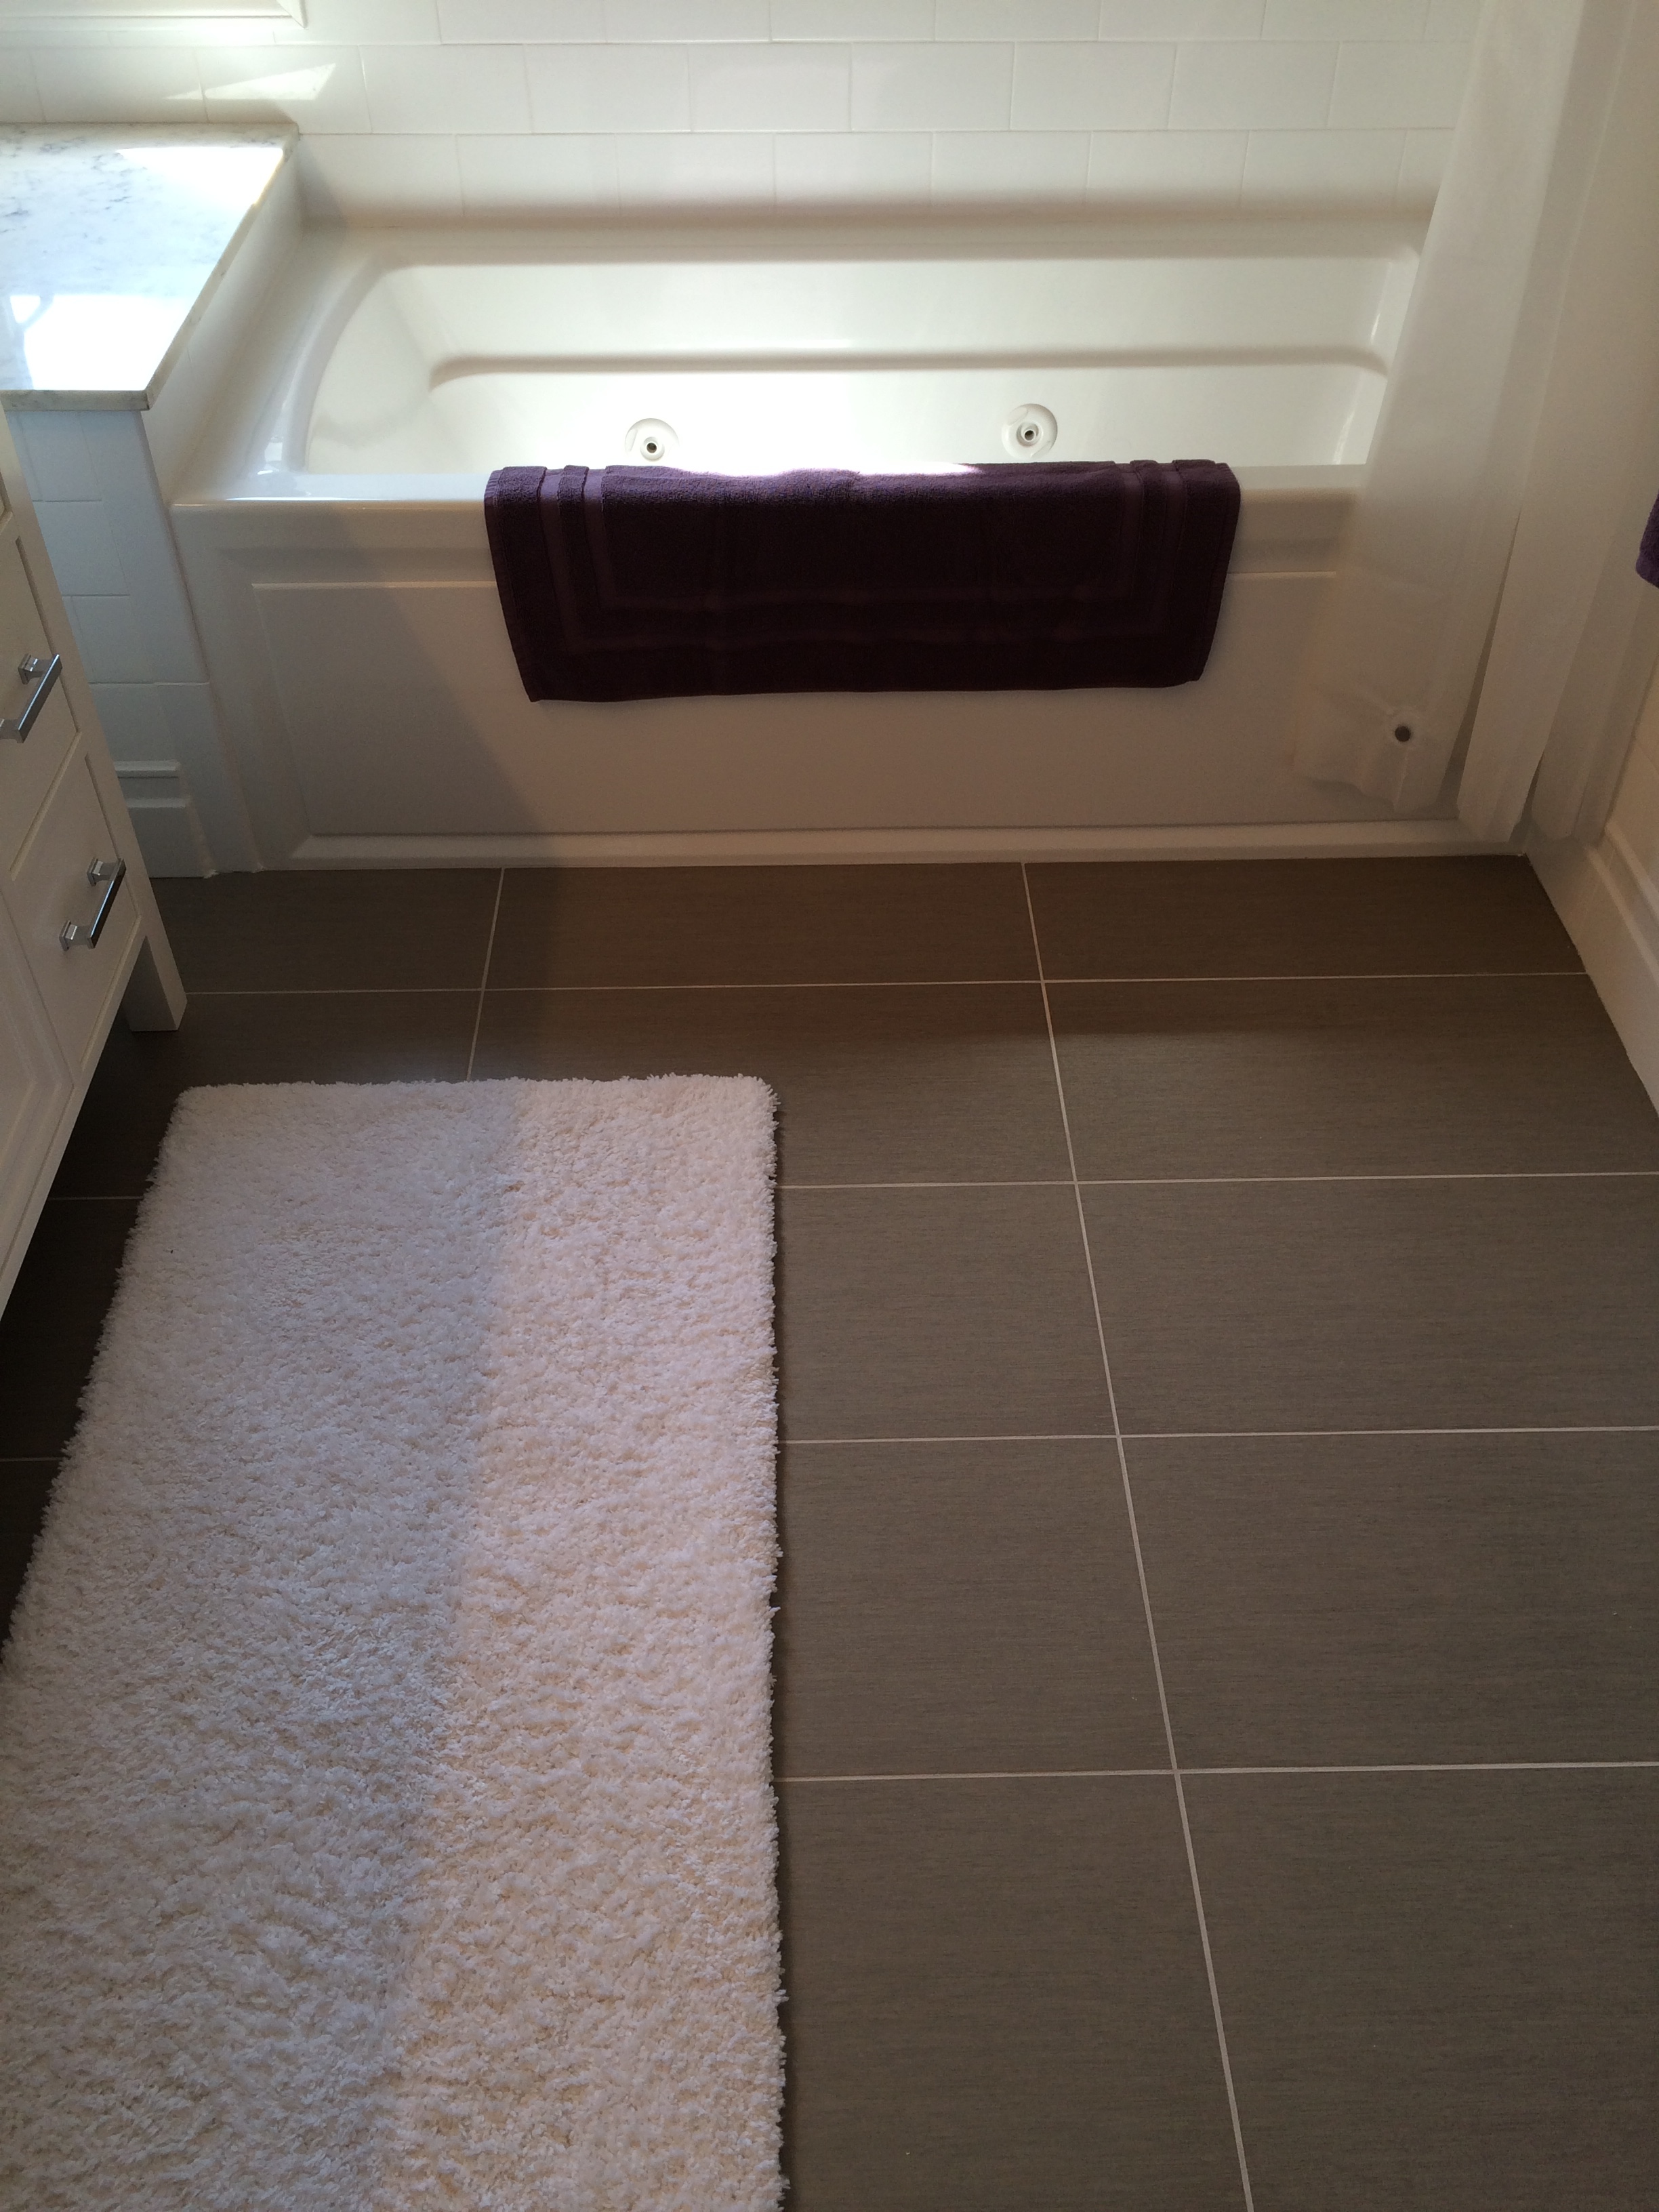
The space in general is quite wide and generous. The bathroom has a vertical window in the far corner and had to be worked around. The original bathtub was a standard width, so the original builder design called for a simple solution of a creating a wood “box” and using floor/wall tile to cover the space. Something new had to be done to update this space. It was essentially covering “dead space”. In addition, there was a step up to the tub and a soffit above the tub…. both were removed for ease of use and to create a more open space.
The new vanity is white with a Carrera marble countertop. I carried this over to the now heightened “box” to give it further dimension and use and then capped it off with marble-looking quartz. By today’s standards, quartz is actually more expensive than marble, but in this case, it was a better solution as the area would get wet frequently and I was concerned about long-term staining – even if sealed. In the end, they both look similar and it is difficult to tell that the shelf is actually quartz and not marble.
Here are the before and after shots….


Flooring is very much a personal choice. Going with a more modern approach from the old 4×4 tiles that surrounded the tub/shower and floor, I designed in medium gray large porcelain tiles side-by-side in a uniform, stacked pattern. The cool gray plays well against the white subway 4×8 inch oversized tiles. By adding color to the non-tiled walls…. it can go from very neutral to more masculine or conversly feminine by selecting a paint color… in this case, shades of pink and purple would be setting the tone.
One of my main objectives in any design is comprehensive layering. Here I have the Carerra marble countertop, backed up to the white subway tile… which is then capped with a substantial chair rail. On top of that is the paint color and the white framed mirror is featured over all of it. Four layers of materials and color give depth to this space without it being too jarring or dramatic. It’s a subtle, yet effective effect that pleases the eye.

Speaking of the chair rail… there are many different effects, some dramatic and some subtle. There was nothing subtle about the base (or sanitary) tile. I wanted a traditional look, so I selected 6 inch base tile to surround the space. Chair rail and base tile can get pricey and I don’t recommend it everywhere. In the long run, it completes this elegant, yet modern space with style.


TILE: CHAIR RAIL | CHAIR RAIL WITH BULLNOSE | BASE/SANITARY
Here are some of the final pictures of the space…. enjoy!
I began this post talking about avoiding bathroom renovation primarily due to inconvenience. Yes… inconvenience can be a real pain, but if you find a great and efficient contractor, then you will know that it was all worth it in the end! By the way…. this renovation was completed in 10 days.


RESOURCES:
Vanity: Bauhaus Bath Coraline 75″ Double Bathroom Vanity Set with Mirror by Wayfair.com
Tub: Whirlpool Archer 5 ft. Whirlpool
Personal Shower: Kohler Devonshire Essentials Performance Showering Package (K-10825-4-CP)
Faucet: Kohler Forte Single 1-Handle Low Arc Faucet (Chrome)
Towel Bars, etc: Mercer Bath Collection by Pottery Barn
Paint: Sherwin Williams Potentially Purple (SW 6821)
Tile: The Tile Shop
Toilet: Kohler Wellworth White


Remodeling your mother’s bathroom will be one of the best gifts that you can give her.
LikeLiked by 1 person
Great post. Agreed that bathroom remodels are the best gifts for mothers, daughters, and anyone really! We love seeing these gifts over at Bathroom Remodeling Yakima WA
LikeLike
This is such a nice blog on the family design renovating a main bathroom for a mother and daughter. This article provides us true and insightful information regarding it. This article is very helpful. I am sure many people will come to read about it in future. You have done an excellent job with this content I must say.
LikeLike
Thanks so much for your kind words and feedback – I am so glad you found this article helpful!
LikeLike
Improve privacy and functionality in your home by adding another bathroom.
LikeLike
Hey, good share you have here. Our bathroom looks exactly like a mess for 3 years, we don’t want my plan grow old for this so we have hired a bathroom remodeller in Boston! We are very satisfied with the quality and friendly services, they just simply do what they say and promise…these qualities are not common anymore that’s why we choose them and really appreciate their services! What a fantastic transformation! Thanks for the share. Best Regards
LikeLike
Thanks for your kind words Jill and good luck on your renovation!
LikeLike
This is such a piece of great information, Laura! So helpful with very wise tips and nice pics, as well. We plan with our master bathroom remodeling Boston maybe in the next 3 months! Presently. we just discovered what we really need for our DIY project, and we shall not choose and hired any contractor. My brother has been fired from his job in Boston would like to help us also! Thank you for your post, Will definitely keep this noted for future use. xo ~Matt~!
LikeLike
Thanks so much for your kind comments Matt! I am finding that this post has been helpful to so many 🙂
LikeLike
Such an interesting topic andamazing post! Thanks for sharing this content. It did make my day as I am finding a content that will make and add more info on my bathroom remodel easton ma. I have already wasted much time and money for some DIY projects. I am still searching and researching for more stuffs honestly before coming up to a final descicion.! We still have a few more steps to be done,but all is good. Thank you
LikeLike
So glad that you found it helpful!
LikeLike
Such an interesting post! Thanks for the helpful advice will use this in my bathroom remodel Easton ma next month.
LikeLike