

BEFORE and AFTER
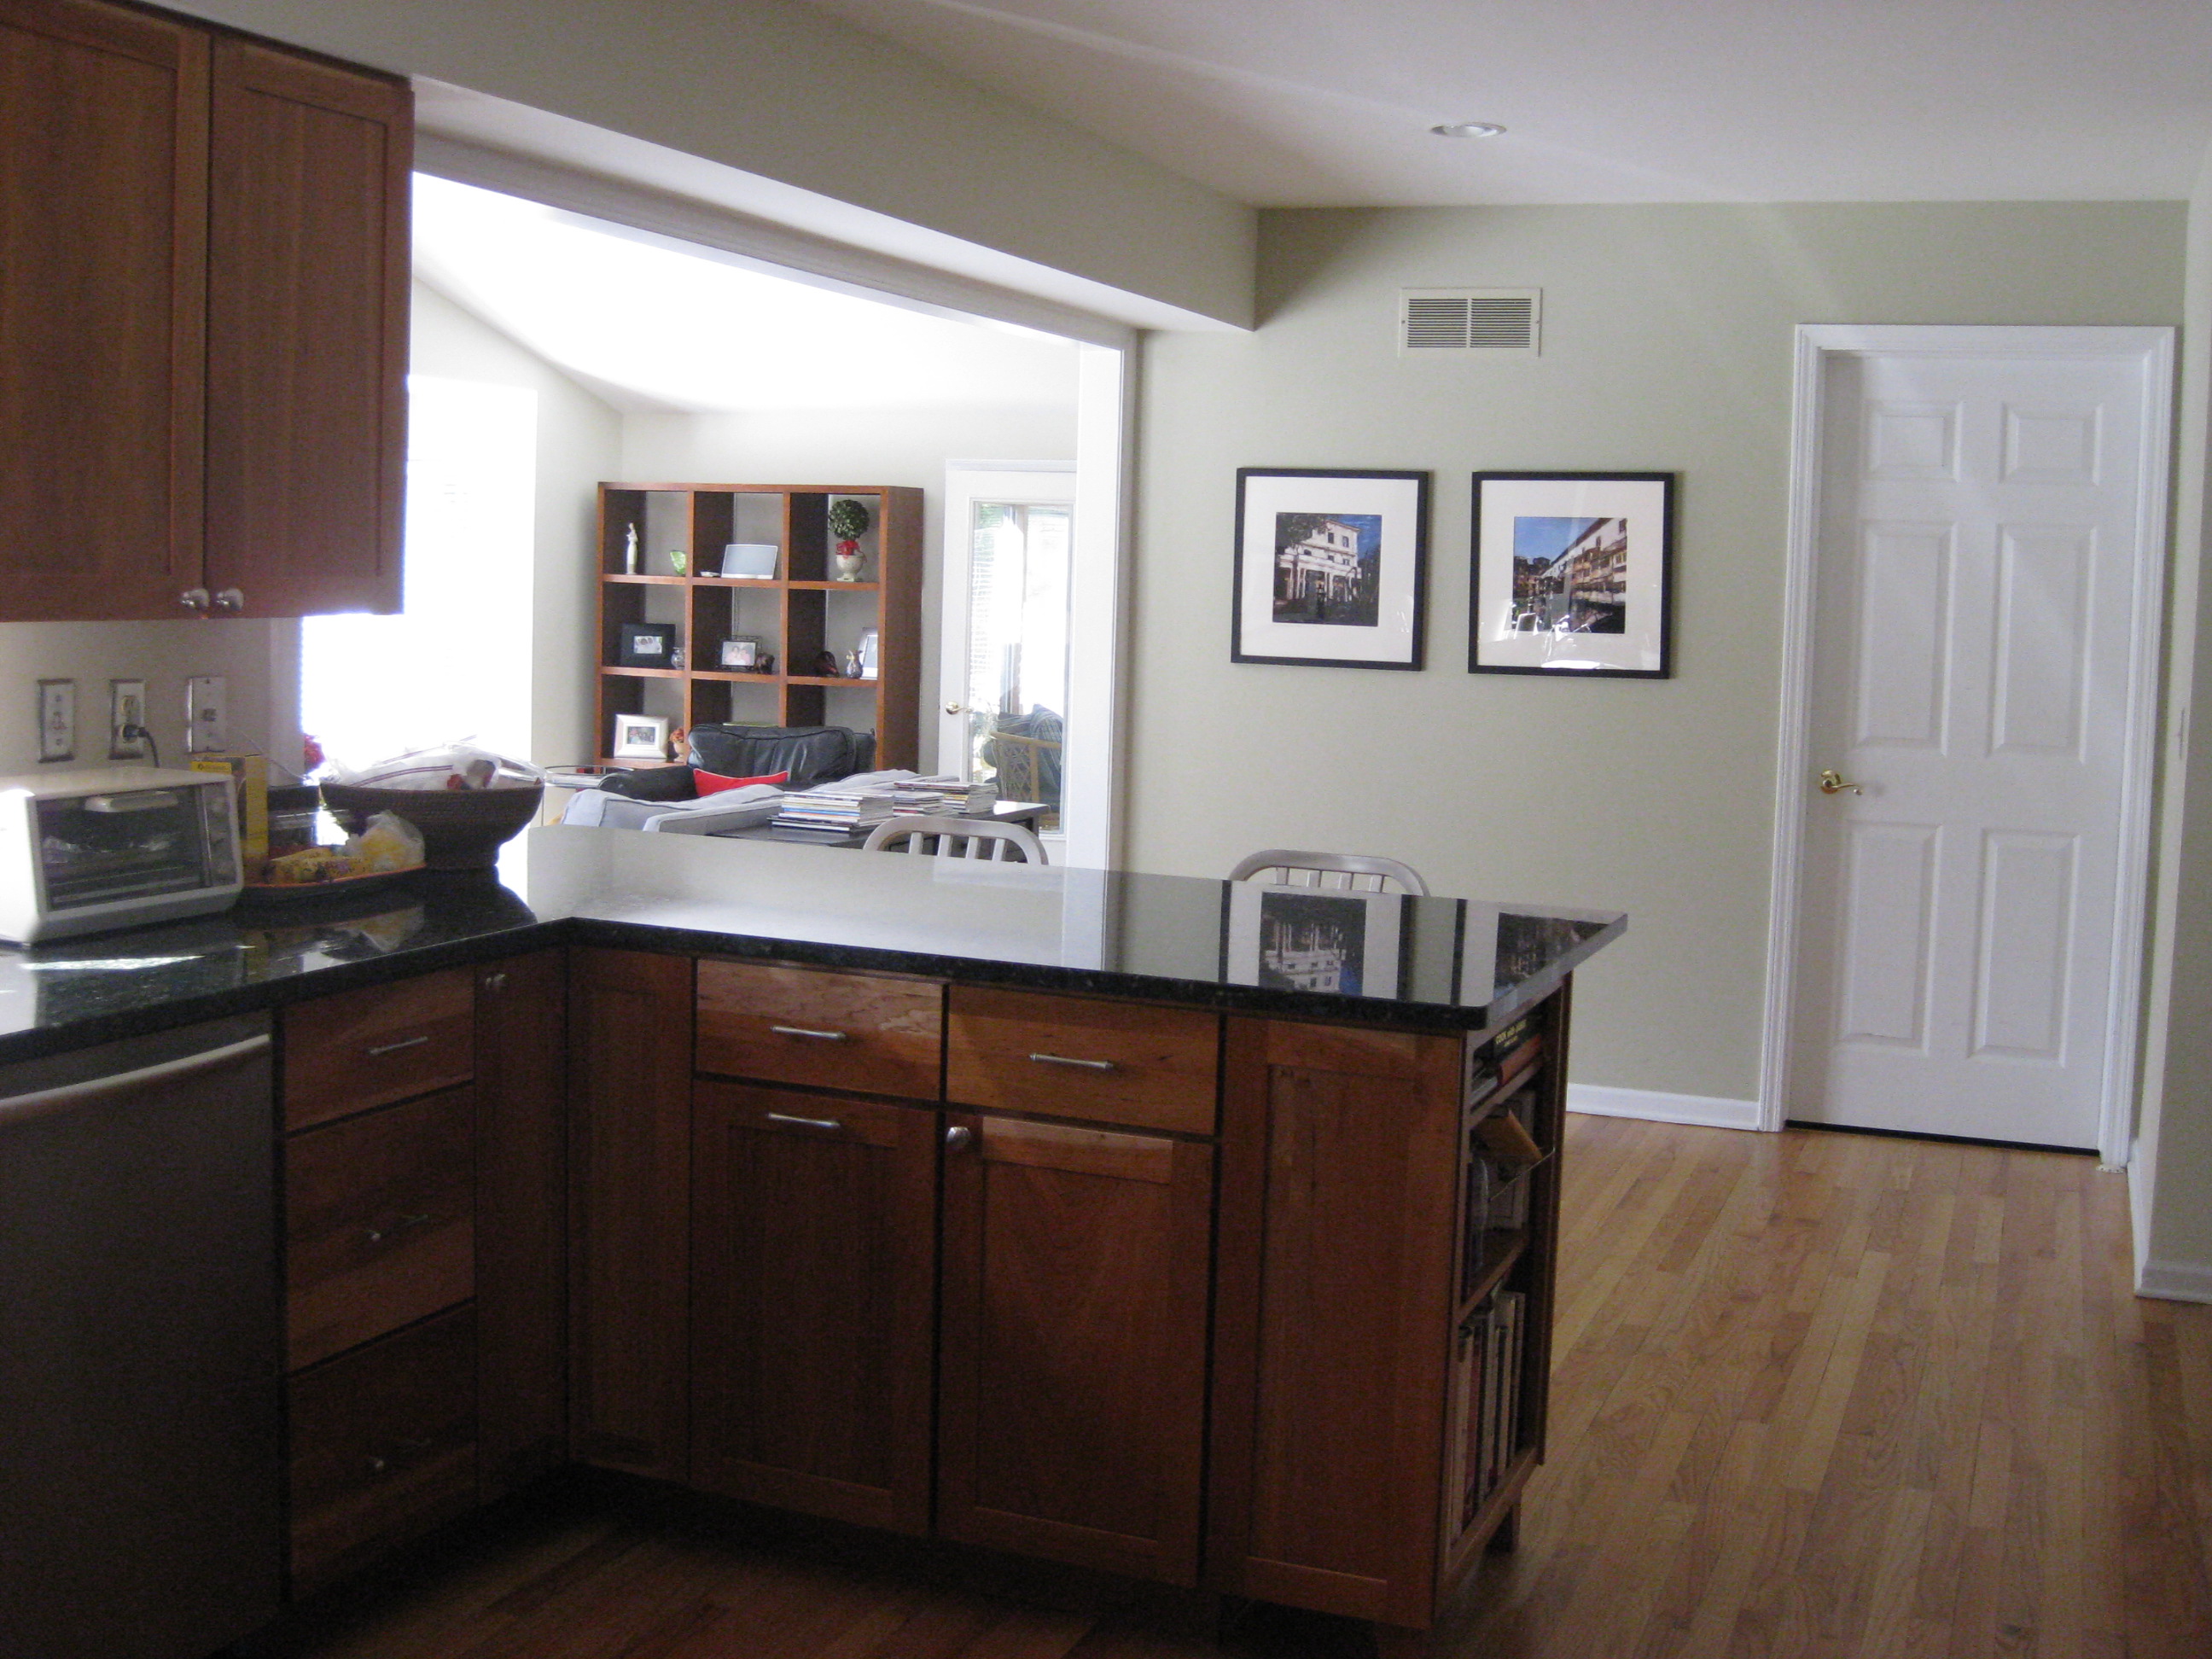
Overall this kitchen is a good size. There is room to work and there is room for a table to sit 4 comfortably. The light is good coming in from a big window over the sink and the layout of the refrigerator, stove, sink and dishwasher is all within the standards of a good “work triangle”. What is a work triangle? The “work triangle” is defined by the National Kitchen and Bath Association as an imaginary straight line drawn from the center of the sink, to the center of the cooktop, to the center of the refrigerator and finally back to the sink. The NKBA suggests these guidelines for work triangles:
- The sum of the work triangle’s three sides should not exceed 26 feet, and each leg should measure between 4 and 9 feet.
- The work triangle should not cut through an island or peninsula by more than 12 inches.
- If the kitchen has only one sink, it should be placed between or across from the cooking surface, preparation area, or refrigerator.
- No major traffic patterns should cross through the triangle.
Efficiency is the triangle’s main goal, as it keeps all the major work stations near the cook, without placing them so close that the kitchen becomes cramped. The work triangle is also designed to minimize traffic within the kitchen so the cook isn’t interrupted or interfered with. That is a lot of information, but if it doesn’t feel like it is good space to work within, you will never want to cook again
. 
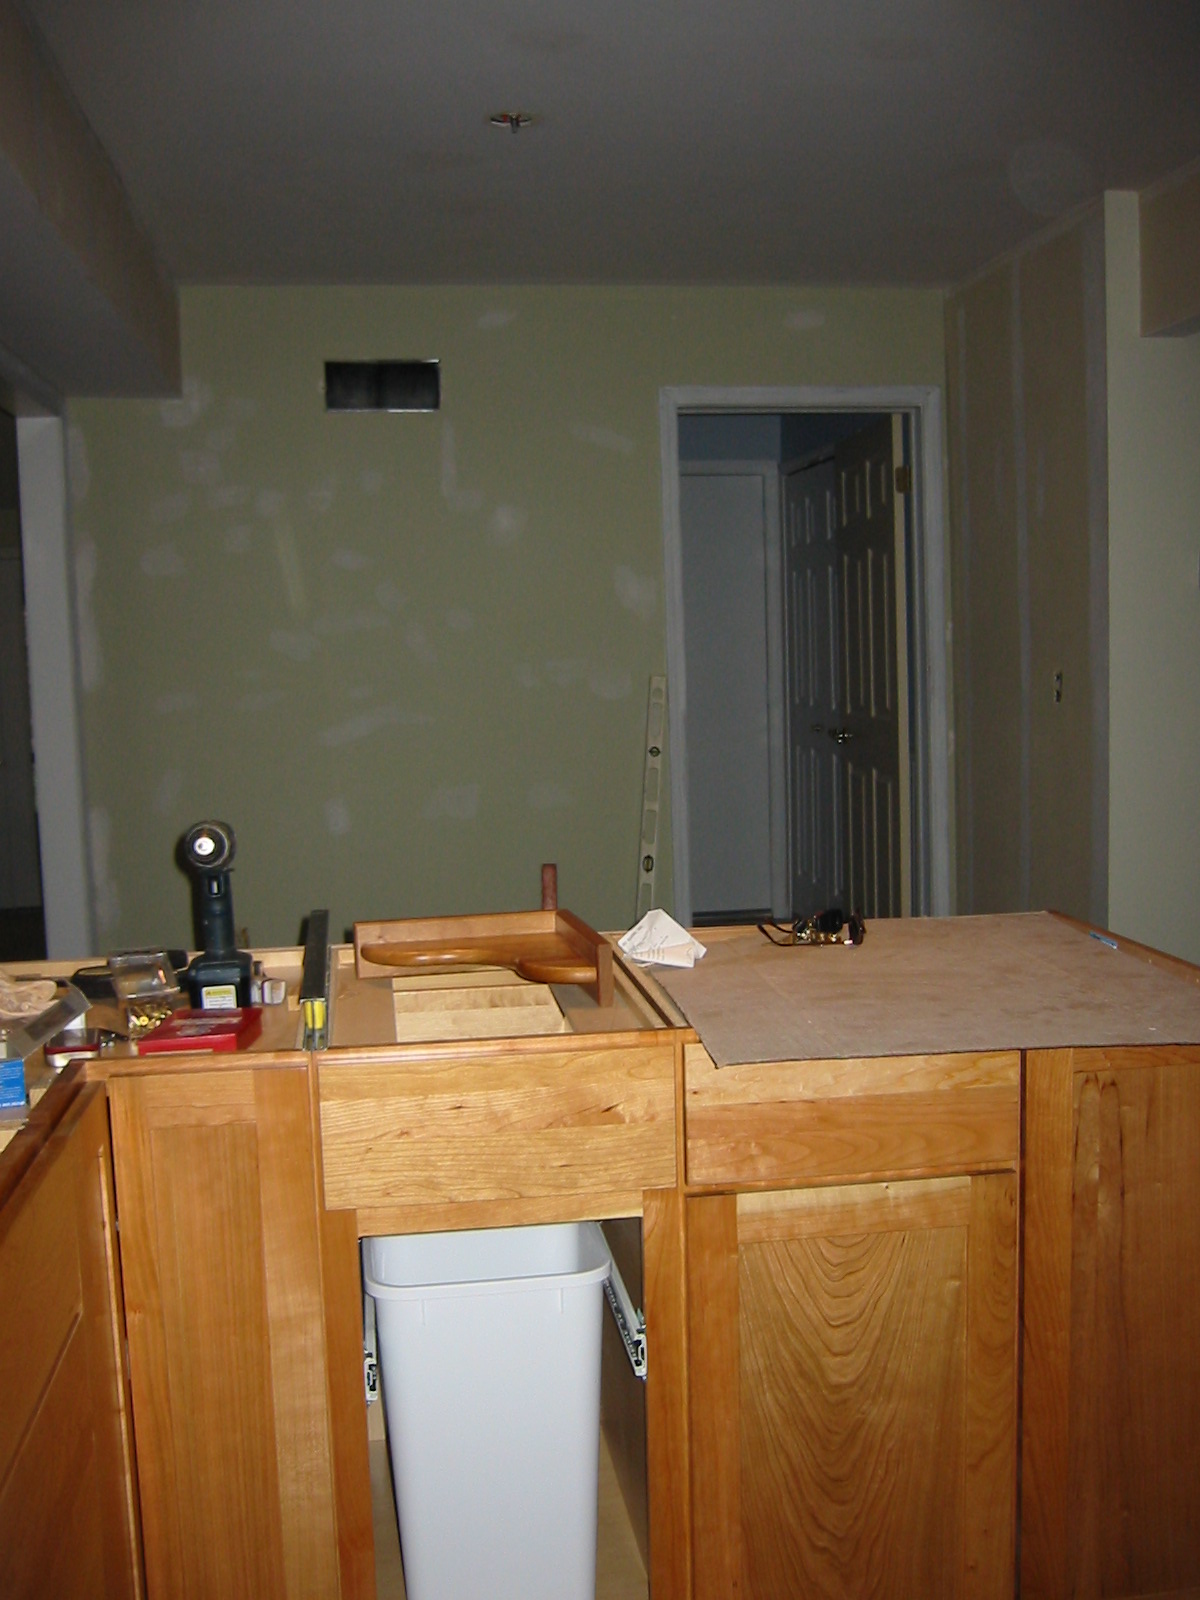
As you can see from these pictures, that the “work triangle” is there, but right in the middle of it was an island that blocked everything. You couldn’t even put the dishwasher door down all the way to load the dishes or even get around it! The first course of action was to demo the island, cap off and bury the power and repair the floor. I redesigned the space and added a peninsula so there was much more usable counter space and a large bar area to gather and eat at. To repair the floor, we just moved some of the existing floorboards so everything matched up. To gain more cabinet space and increase the visual size of the kitchen we demo’d as many of the soffits as we could. Soffits were used throughout the kitchen (the big drywalled in area above the cabinets) — some had ducting running through them so we had to keep some avoiding the cost of rerunning the ducting at too high a price
. 


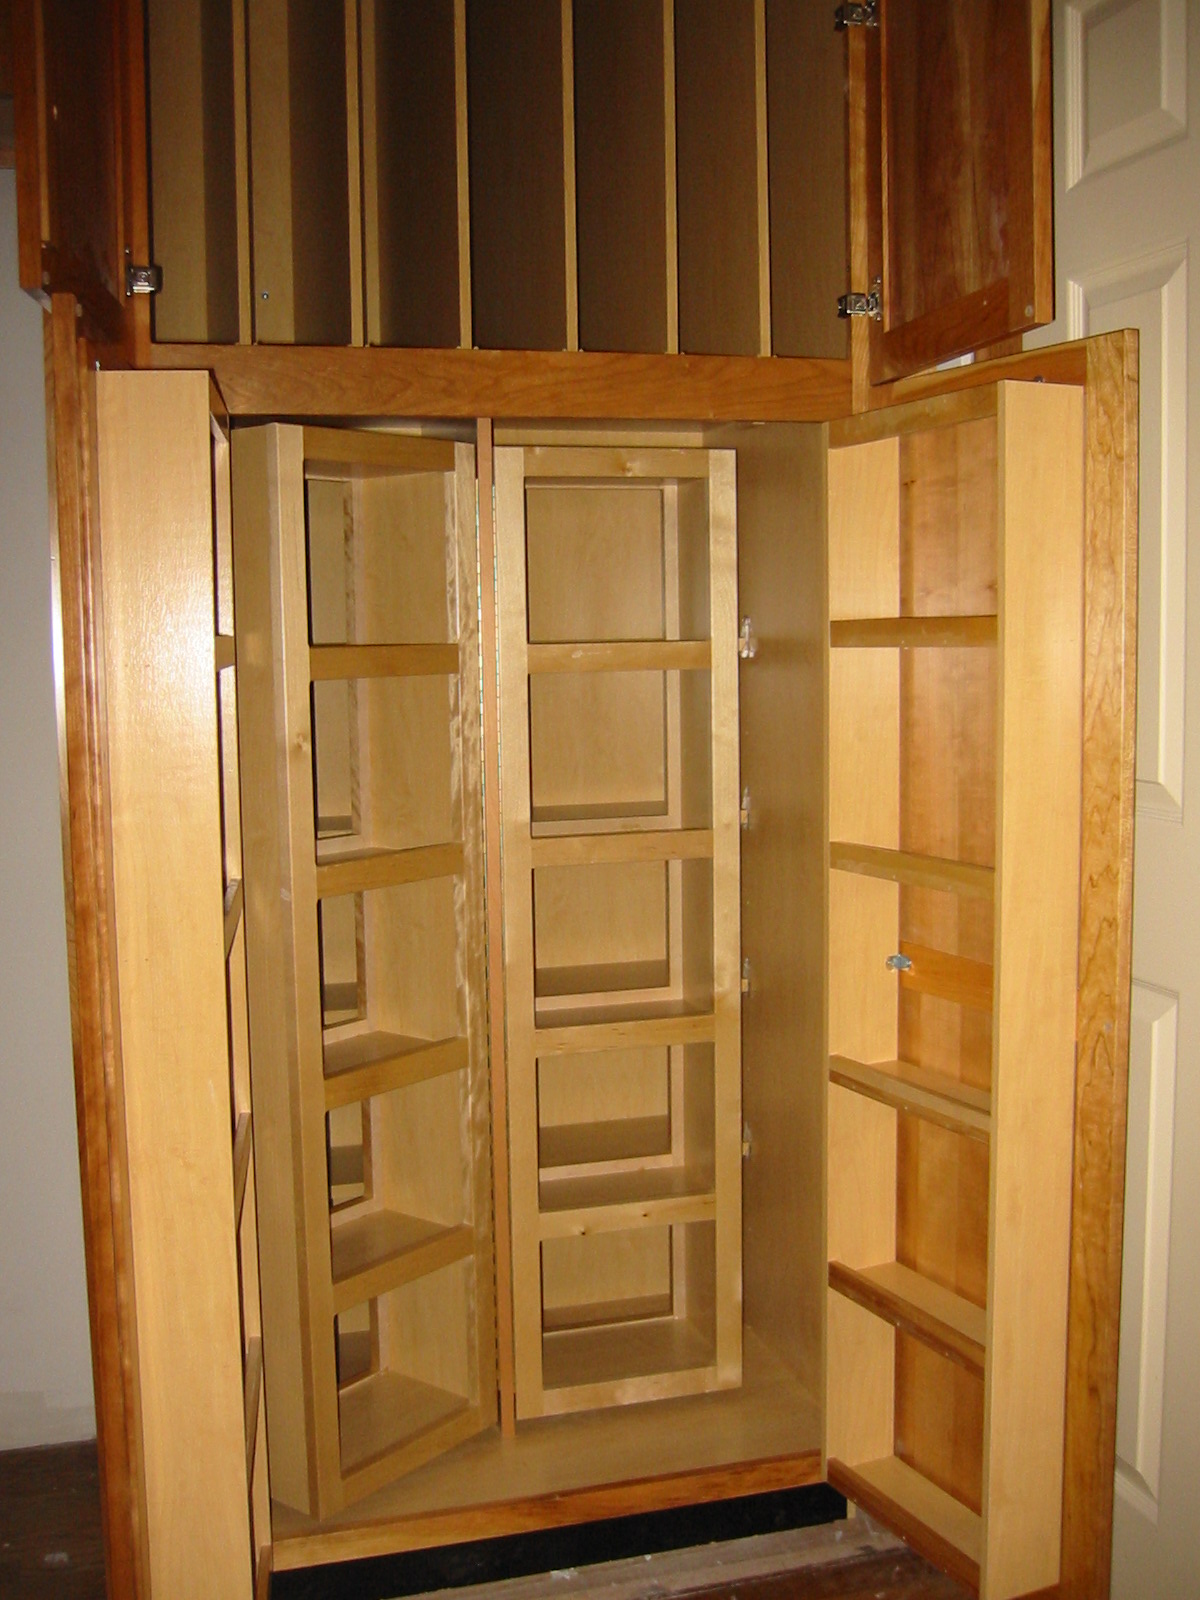
After demoing the old reach in pantry, I had a custom swing-out pantry built to maximize storage options (space on the doors, and two layers of storage within. In addition, I designed a vertical stacking space above for cutting boards, cookie sheets, cooling racks, roasting pans, and platters. The vertical space keeps everything well-organized, easy to reach and the clutter is removed from the space.
Even though the house was built in 1985, we found a couple of “legacy issues” when moving some things around including: plumbing not draining properly — a new tie into the stack in the corner needed to be run. And we discovered a small electrical line running through ducting where the stove was going. Hummmm… not exactly to code, right?!

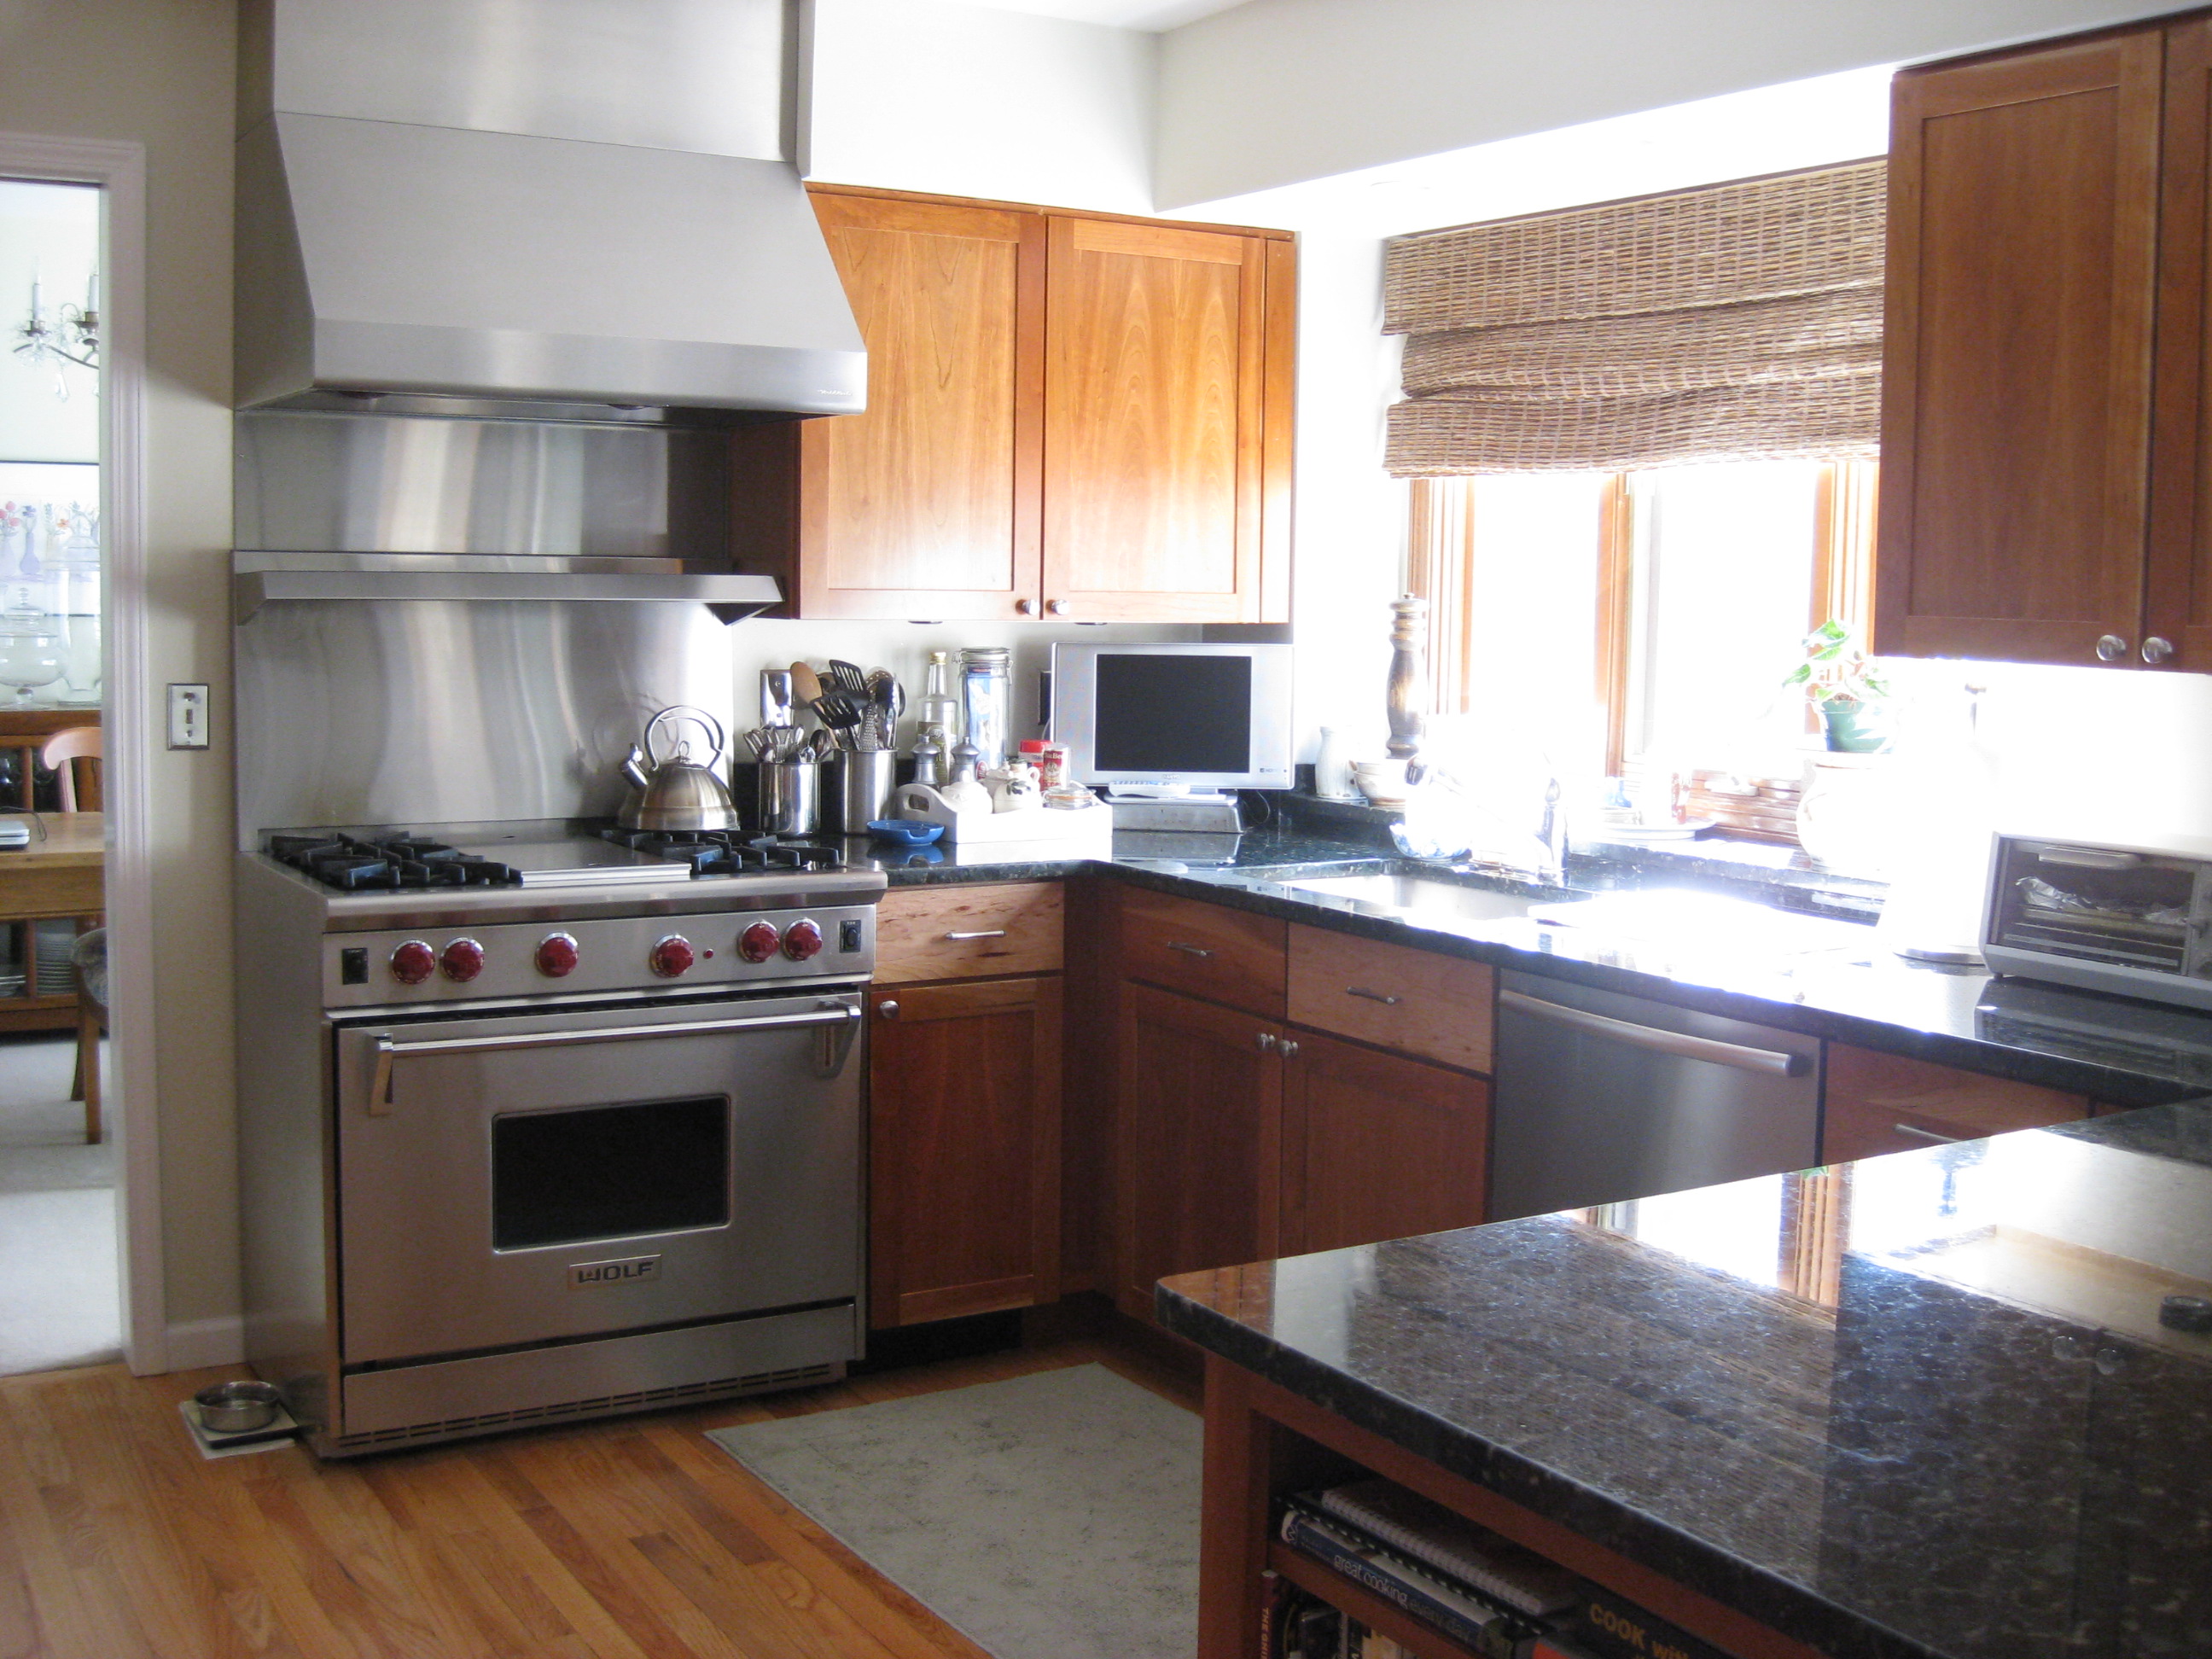
The goal was to make this a proper chef’s kitchen so the Wolf dual fuel convection oven was a must. This is not the standard 30″ range, but 36″ to accommodate the radiant grill between the gas burners. The exhaust vent also needed to be upgraded to support the stove, so all new ducting was run and a powerful Vent-A-Hood system was installed that ran around the perimeter and outside in line with the sink. Kraftmaid cabinets were installed throughout the kitchen in a natural cherry wood. There are a variety of grades that you can order through any manufacturer, but Kraftmaid consistently delivers quality. You pay for additional features including different drawer configuration, full pull-out drawers, soft closures, etc. In addition, you can go with full wood doors, or have inserts that are laminate. There are choices for most any budget.
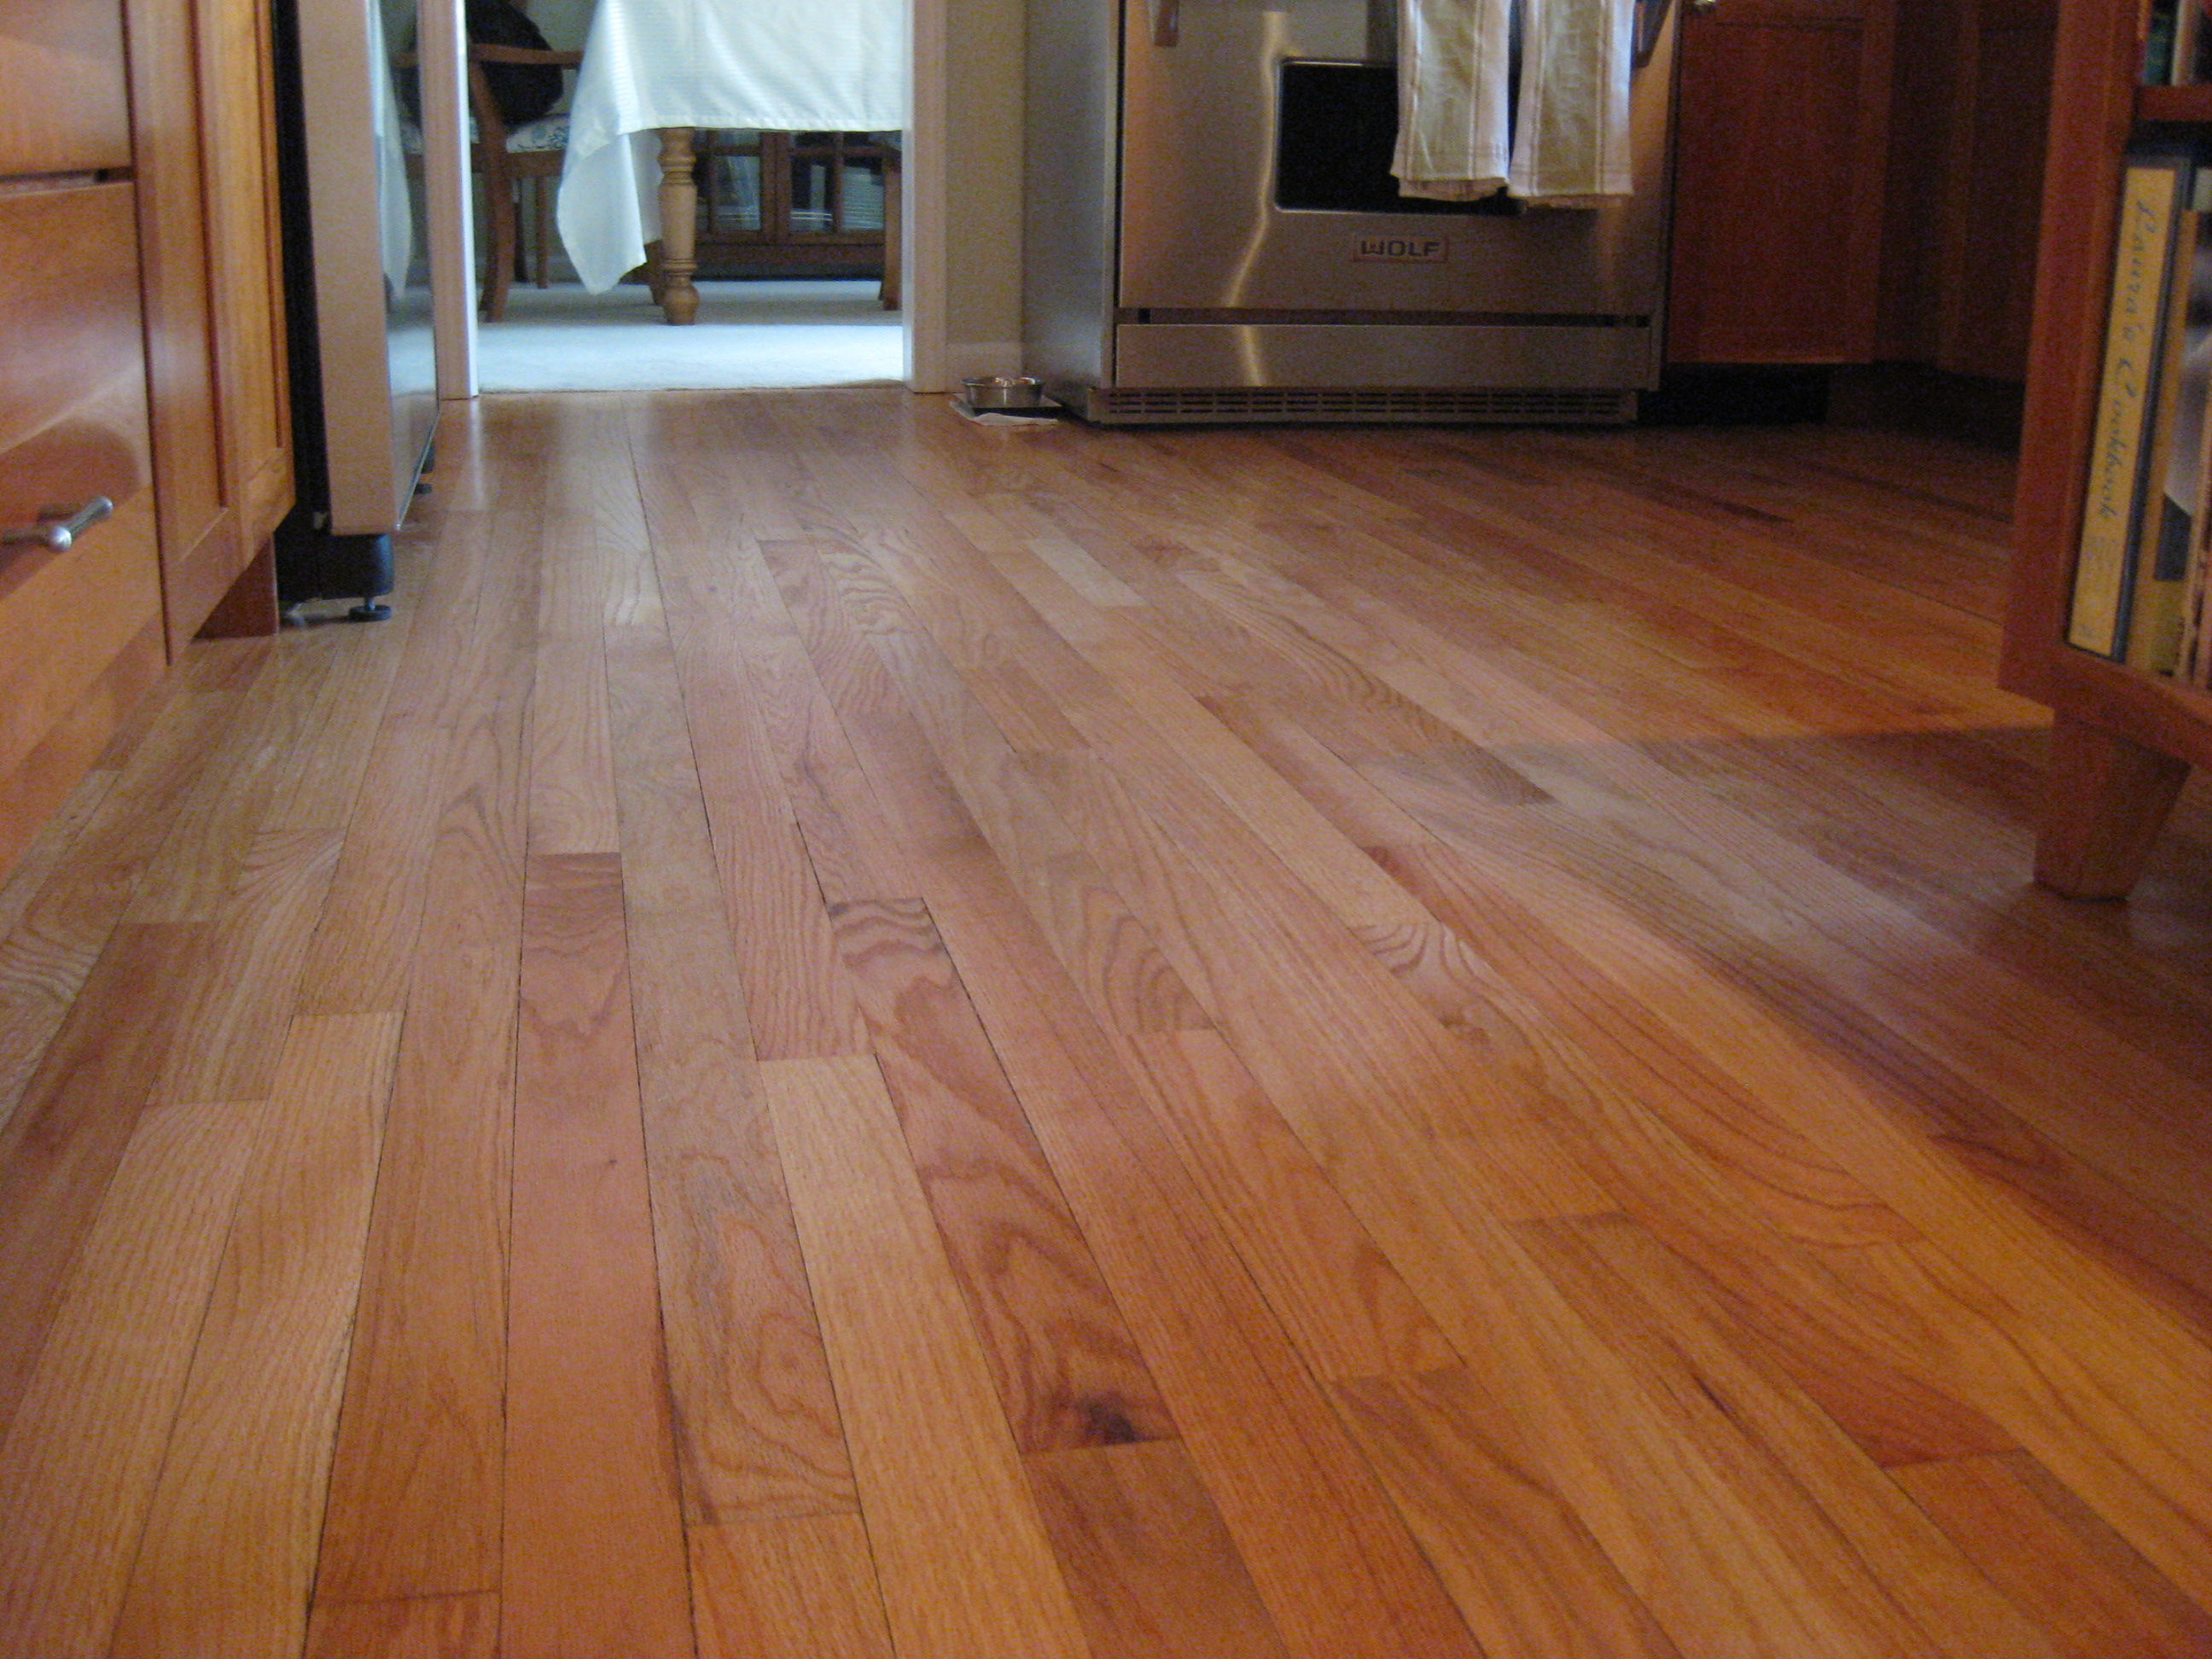
The sink was another story. The homeowner envisioned the largest and deepest single sink possible that supported a garbage disposal underneath. The beauty of the Elkay sink was that it was large and deep at 21″, and was able to be under-mounted. In worked beautifully, and in the end, the homeowner was able to bathe her baby in it! And the design was capped off with Verde Butterfly granite countertops. Foregoing a traditional backsplash from the countertops to the bottom of the upper cabinets, the walls were painted in a light sage green with a darker feature wall in the open space where the table was in the original design. The granite backsplash was enlarged from a standard 3 to 6 inches high and surrounded the kitchen. The window sill was reconstructed to have a ledge for pots and herbs to grow throughout the year with SW exposure. The original wood floors were in great shape and just needed a new refinishing. And at the end of the peninsula, I added a bookcase with feet for all of the cook’s “books” to maximize the useable space. Here are the final images of the finished space…. we achieved better flow by opening the space up and giving it lighter, brighter appearance with a solid foundation of natural wood cabinetry and a darker, engaging granite countertop.

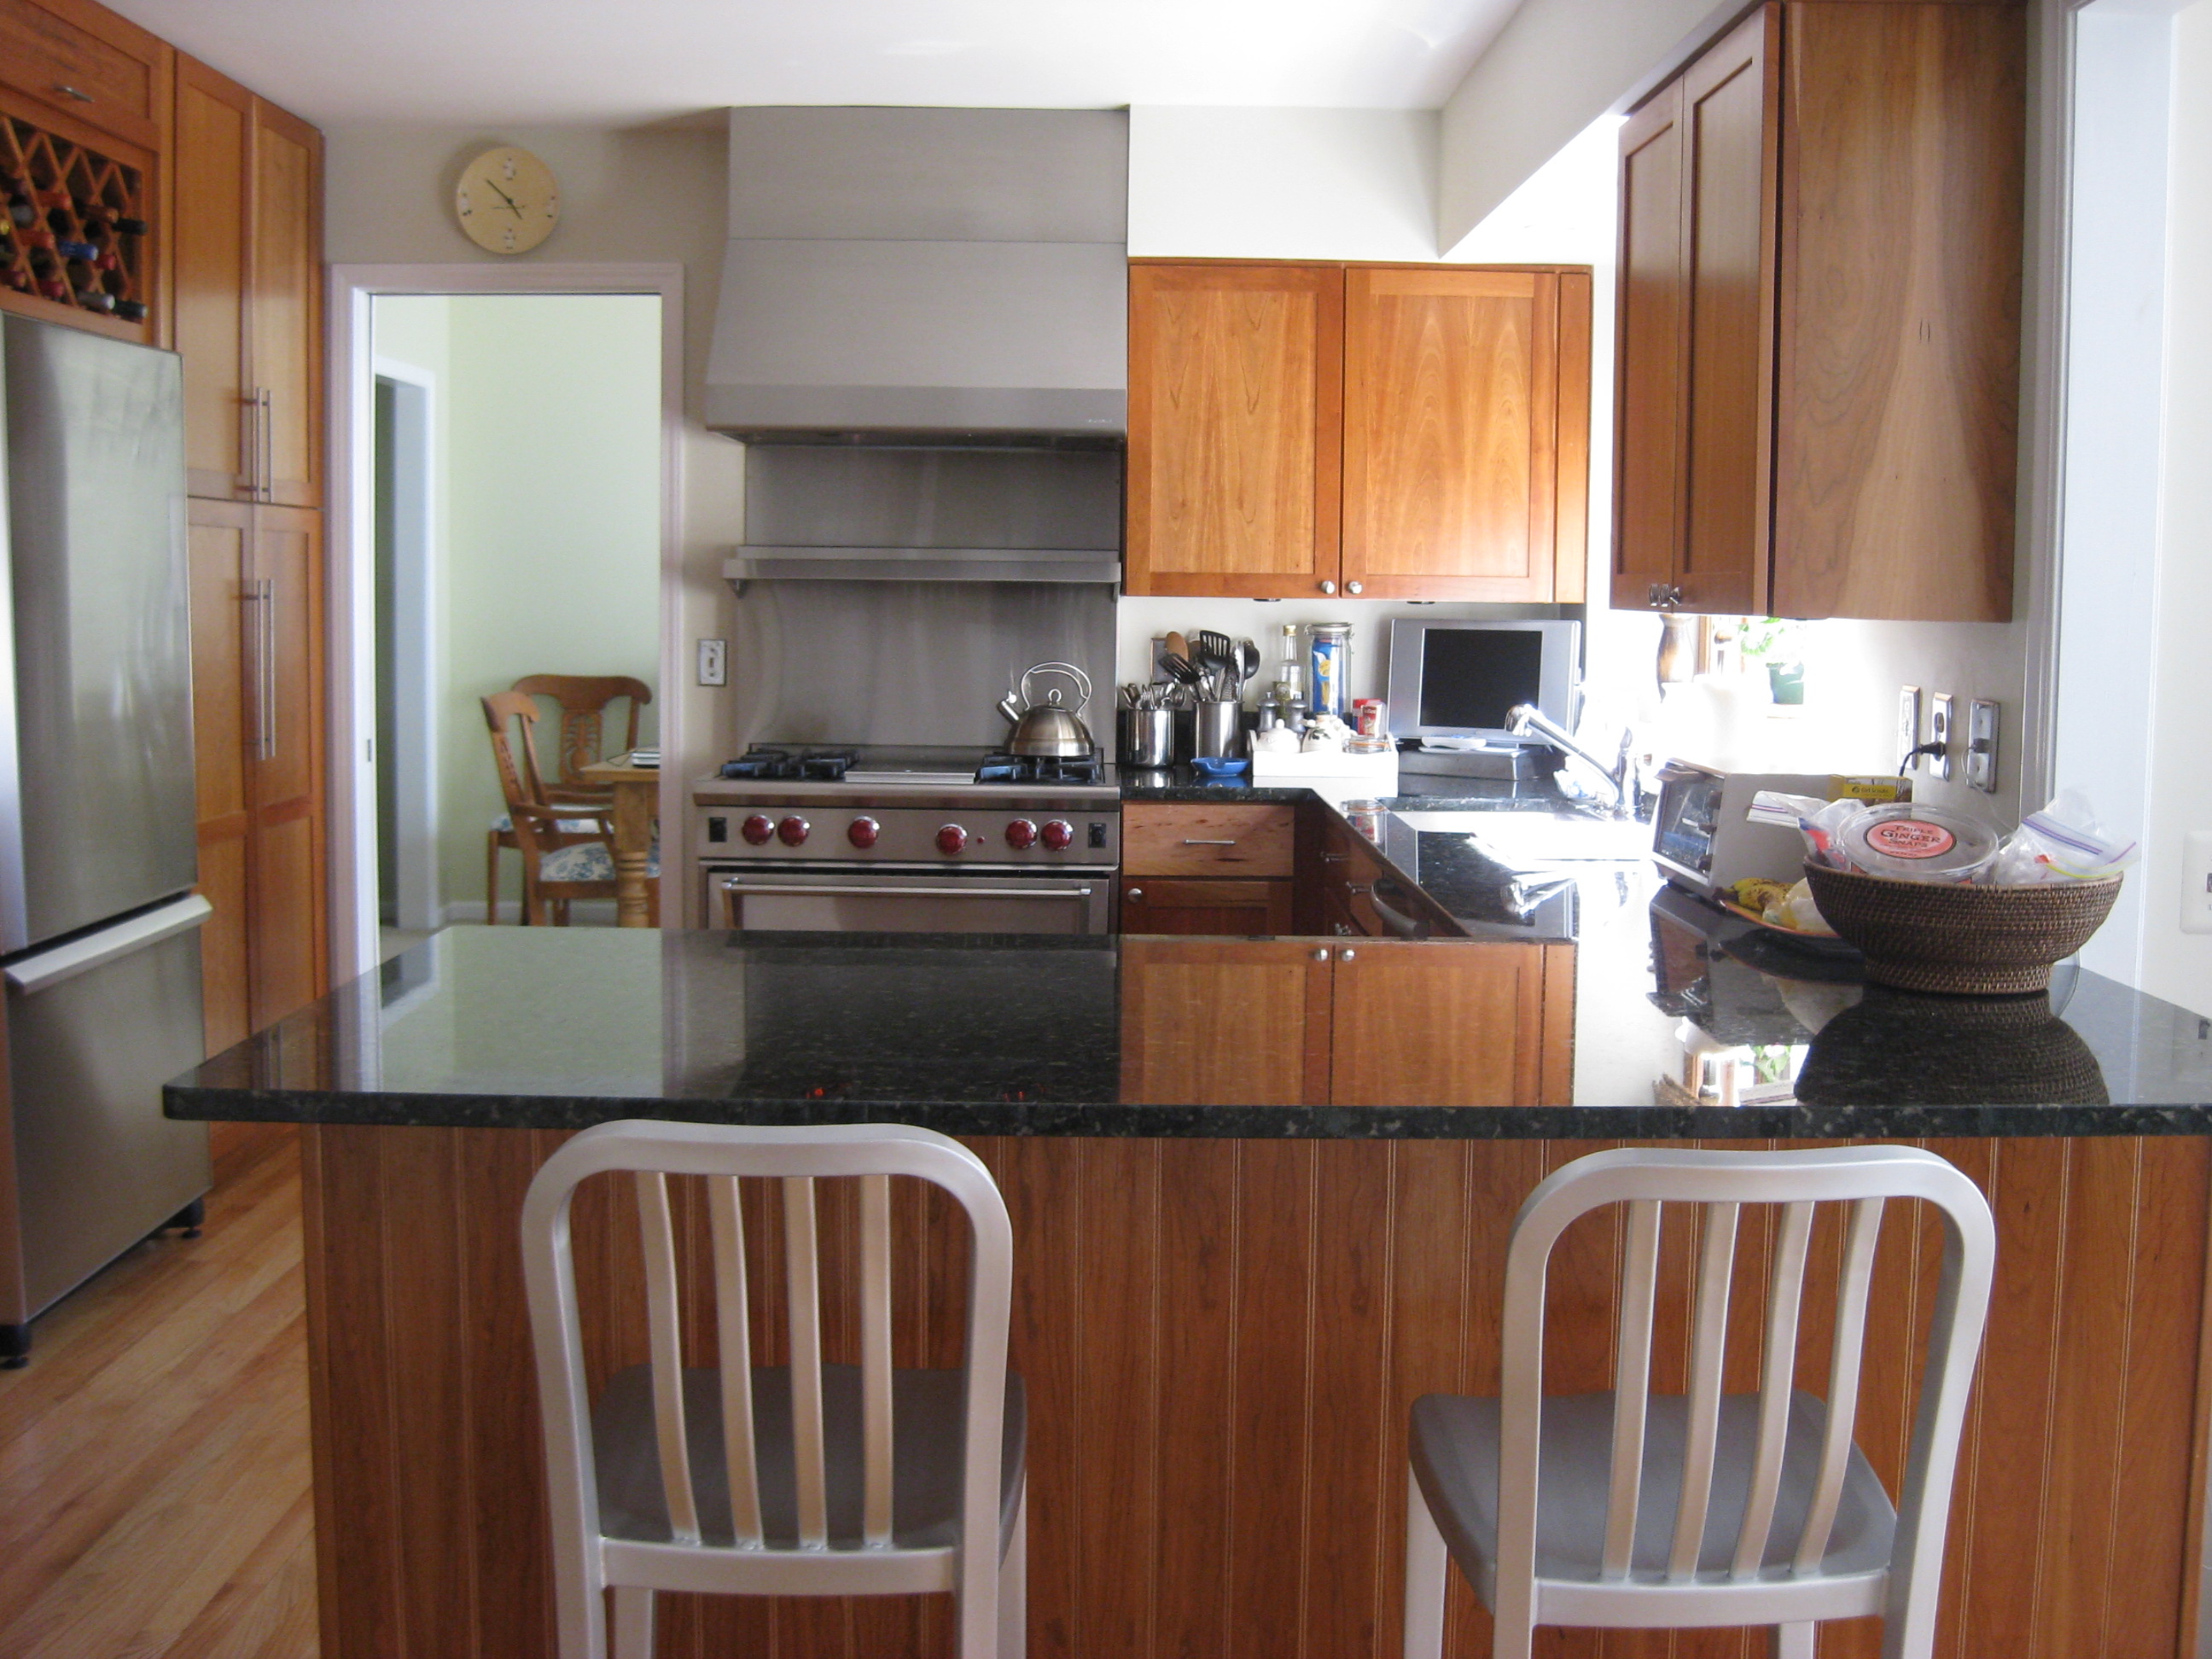
RESOURCES: Countertop: Verde Butterfly Granite Cabinets: KRAFTMAID Cherry Solid Wood with Square Recessed Panel Stove: WOLF DF364C 36″ Pro-Style Dual Fuel Range with 4 Burners & Charbroiler SS Vent: Vent-A-Hood Magic Lung Professional PRH18 Sink: Elkay ELUHAD2115PD Gourmet (Lustertone) SS Single Bowl Undermont Sink Refrigerator: KitchenAid 19 cu. ft. Single Door Bottom-Freezer Refrigerator Dishwasher: Bosch – 500 Series Paint: Benjamin Moore Camouflage #2143-40

