

In my first entry, I mentioned that finding “hidden potential” is key in purchasing an older vacation home. Here’s what I mean by that…
- Does it have good flow… an ability to entertain well with an open floor plan with a good-sized group of people?
- Is there sufficient seating so that everyone is comfortable?
- Does it have a quiet area so you can take a break from a larger group?
- Is there good separation of the bedrooms, or are they altogether in one part of the house?
Today, I am going to focus on sharing how I assessed the renovation plan for the house by evaluating the overall structure and layout of the house and what that would mean for the flow of the common area space.
First Impression
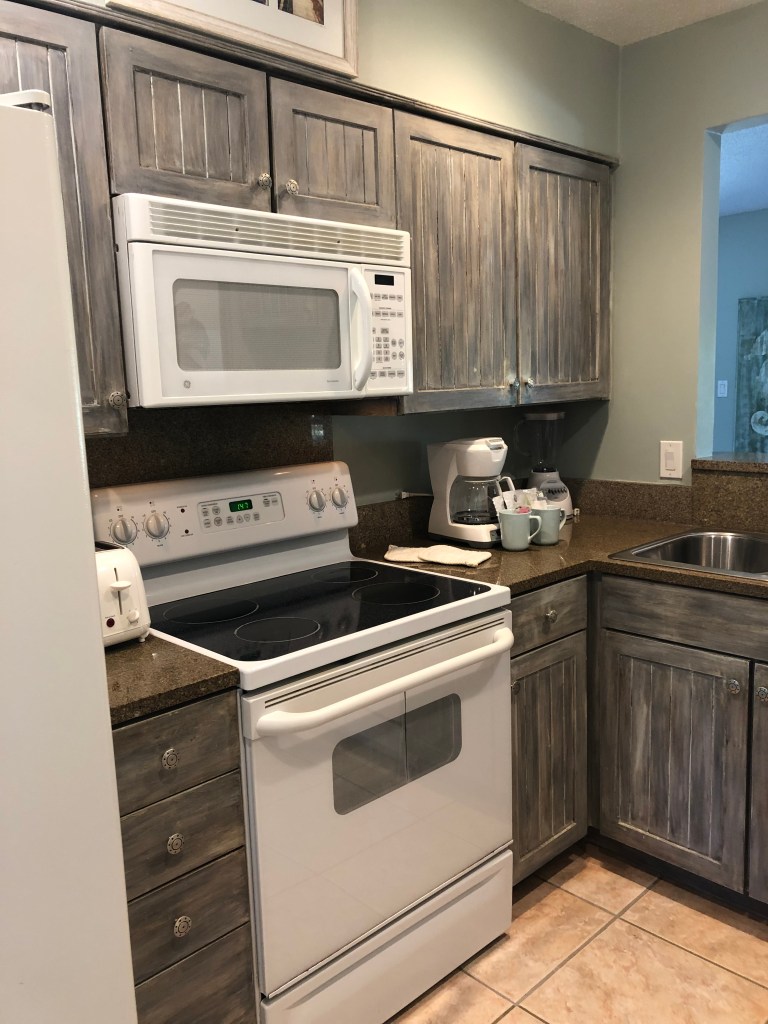
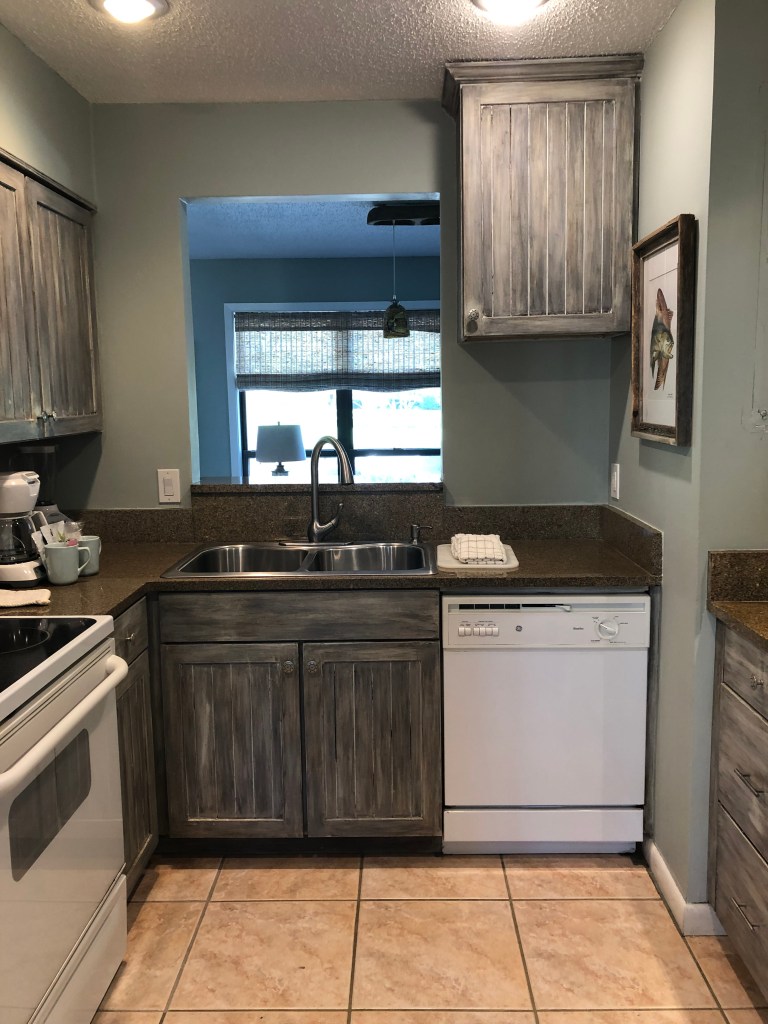
When I first stepped into the house I was met by an interesting vaulted ceiling that ran left and right from wall-to-wall and back to the kitchen area. And then it stopped dramatically at a header with a standard 8-foot ceiling… essentially I was looking at one-half of a vaulted ceiling! It was interesting for sure, and did really open up the main space of the house, but all I could see were popcorn ceilings and a square box right in front of me. And it was the kitchen.
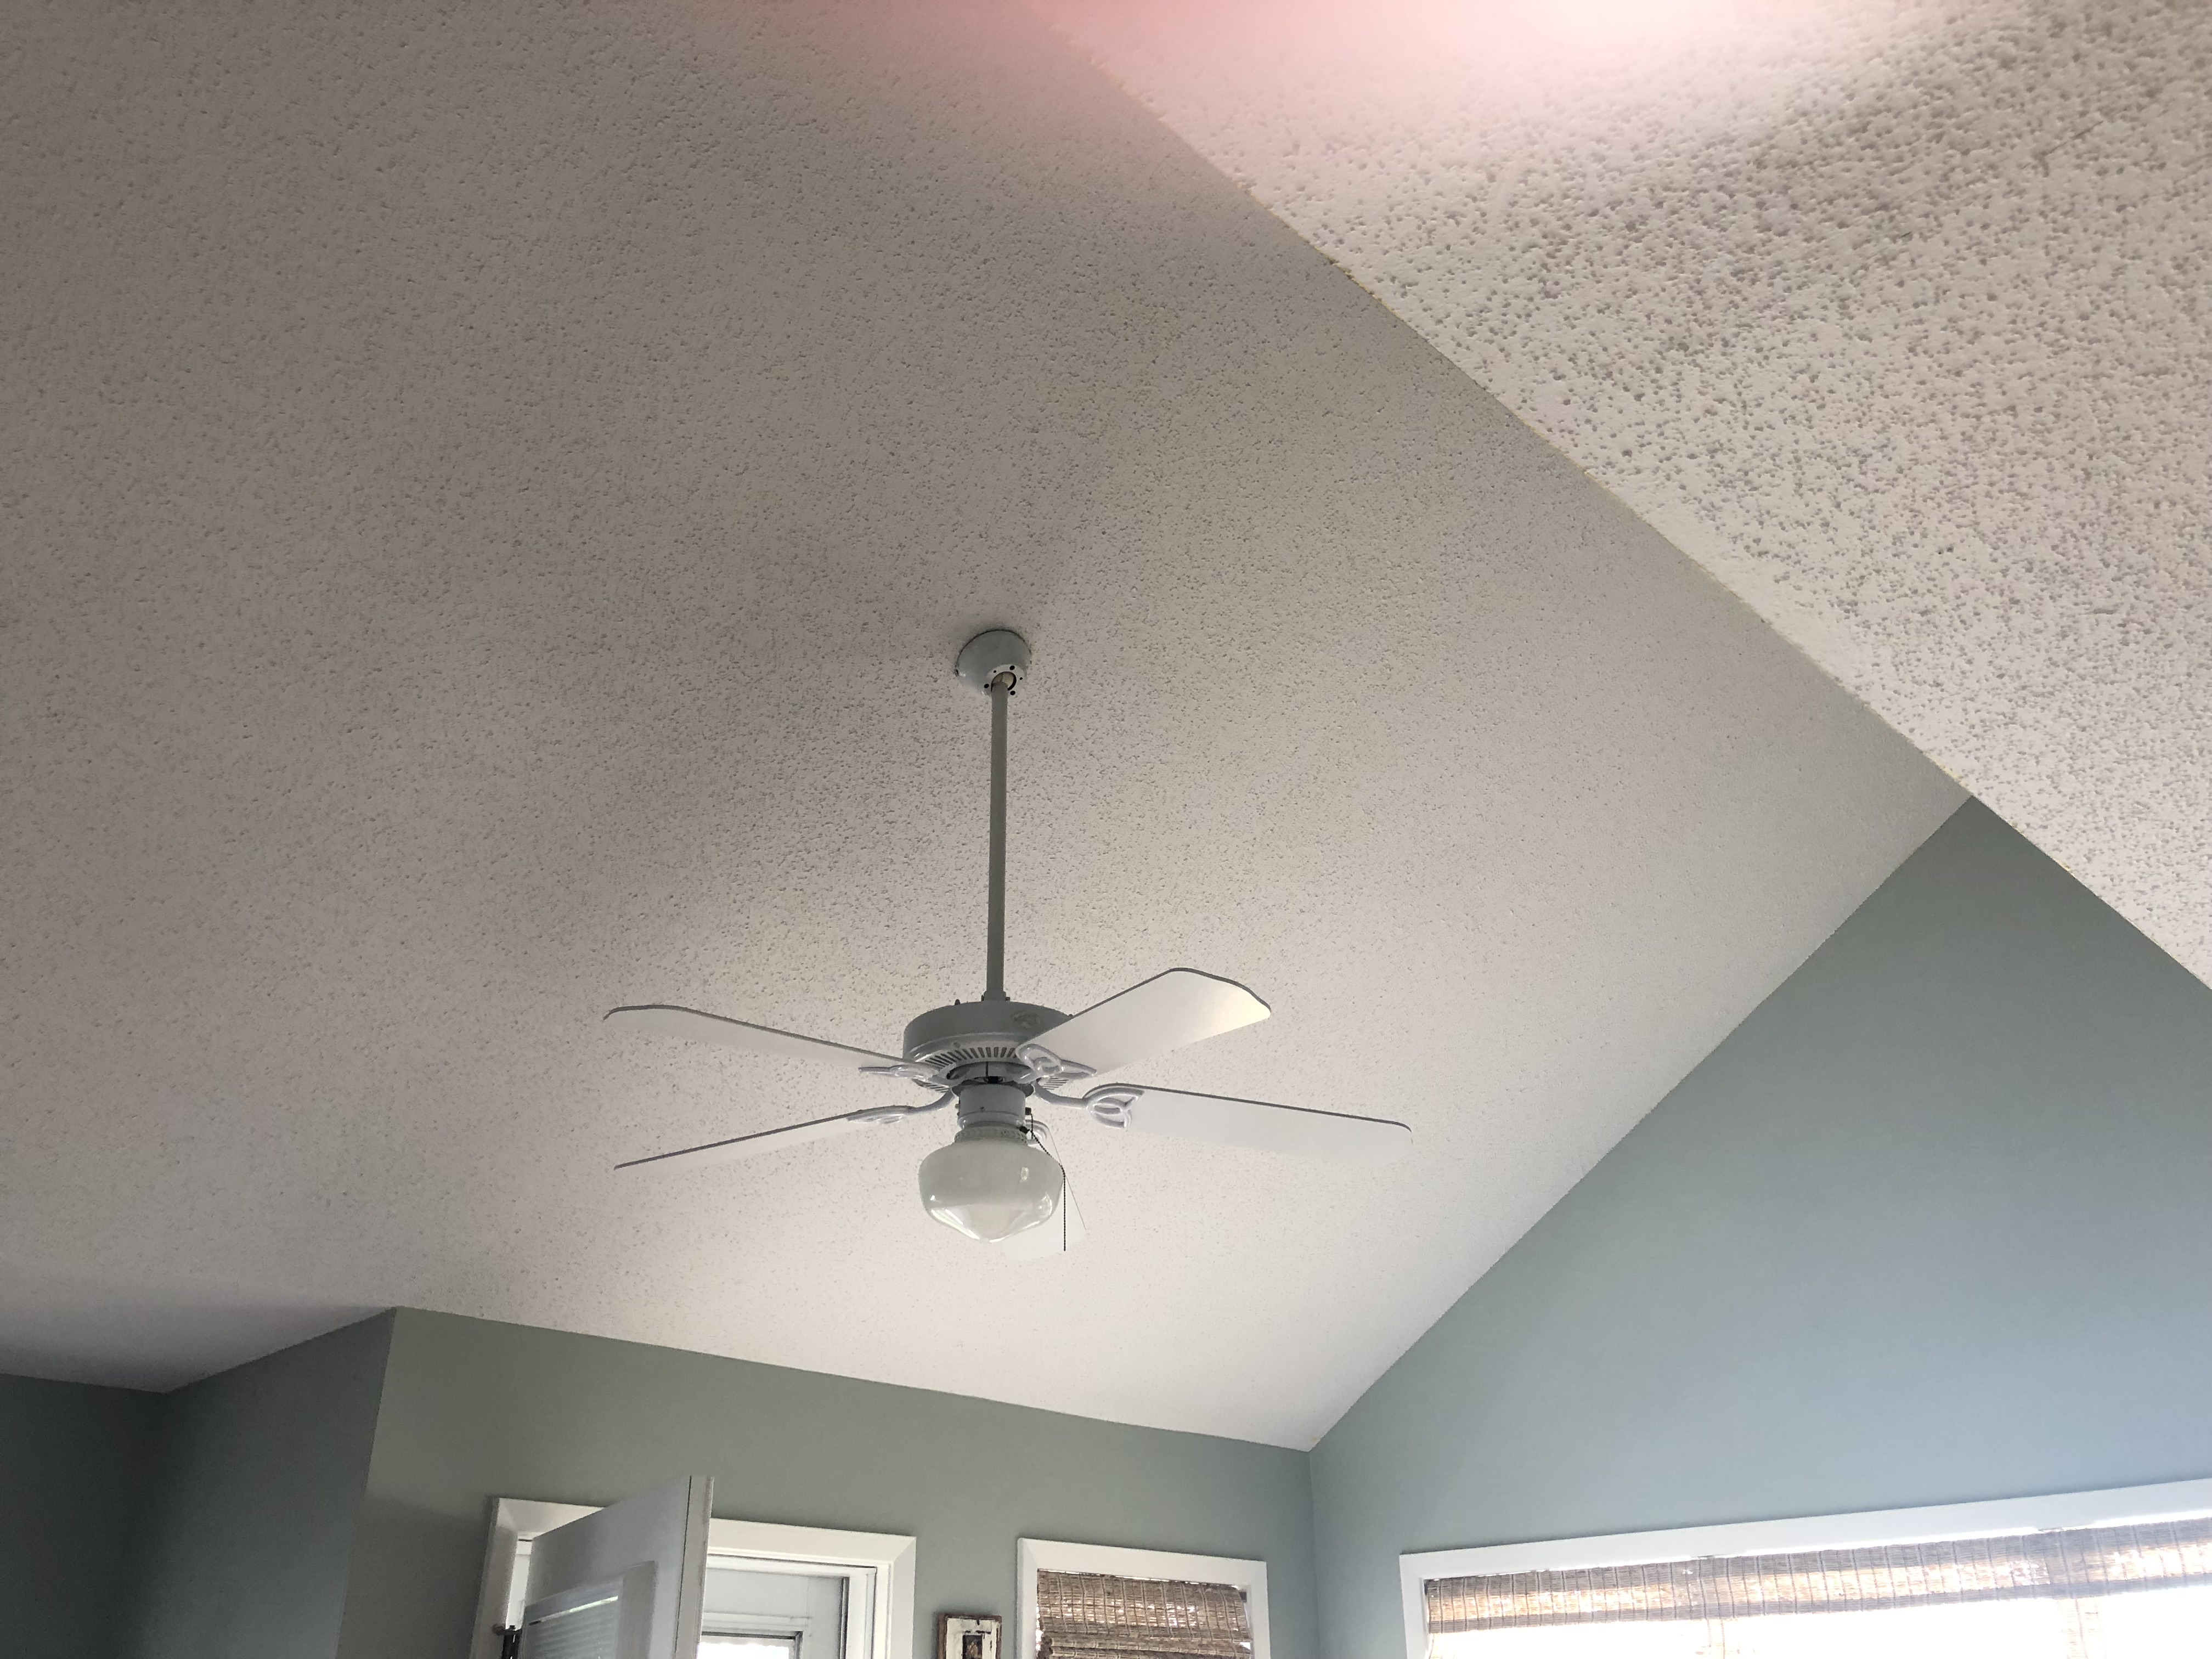

The challenging part about the kitchen, besides being small, was that it essentially floated in the overall Great Room space – blocking expansive views of the back patio and golf course views of the Sandestin 17thLinks fairway. “Such a shame,” I thought. “If they had just moved the kitchen to one wall or the other and jutted out, it would have been fine.” But this dilemma stuck with me…. What could I do?
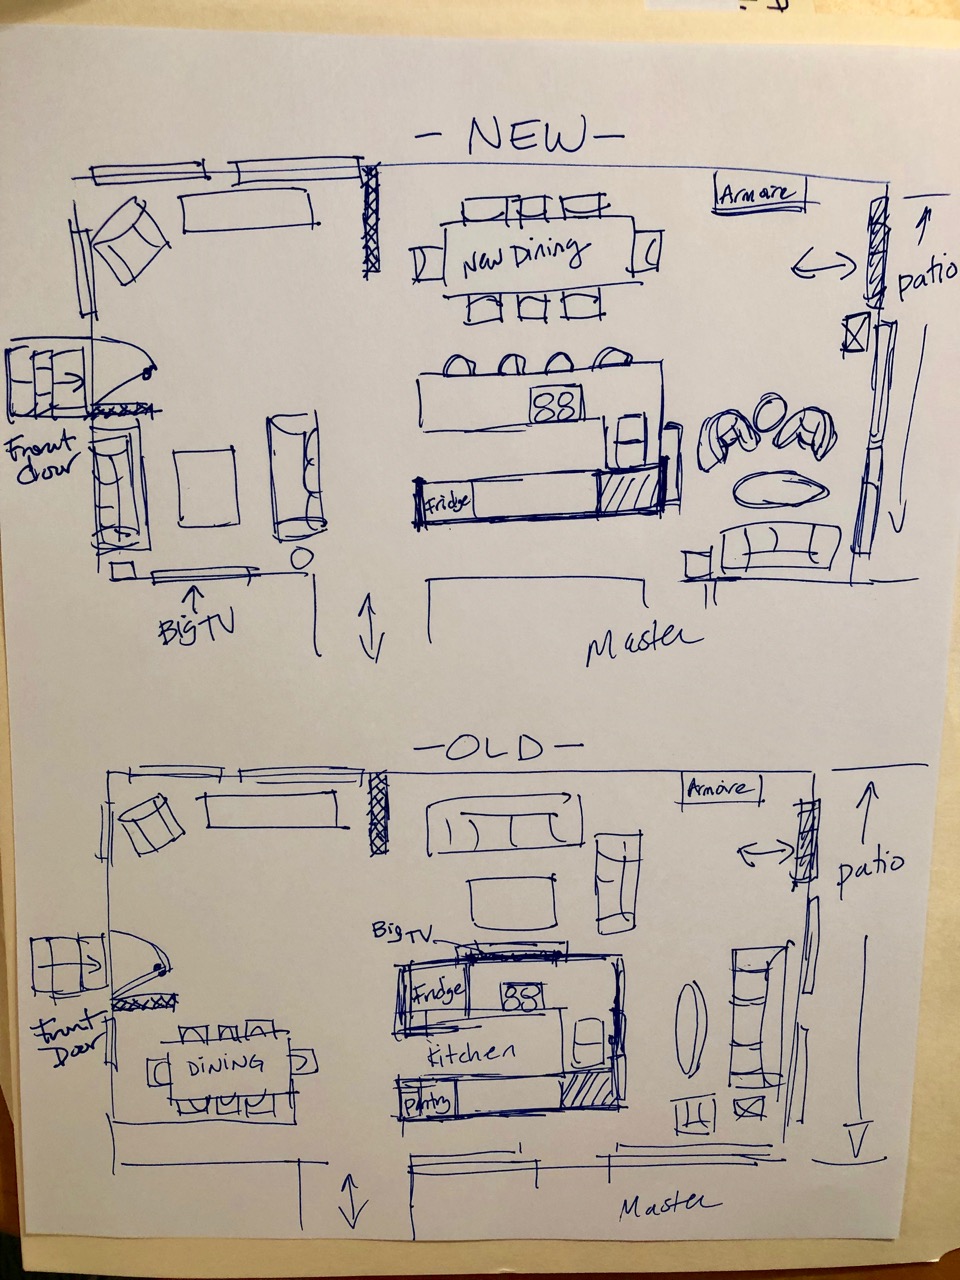
Here’s a better way to describe it:
When you walk into the space from the front door, the big table and chairs for seating was on the right – which made sense as that was the exit from the kitchen.
On the left was a nice woven high back chair and table by the door.
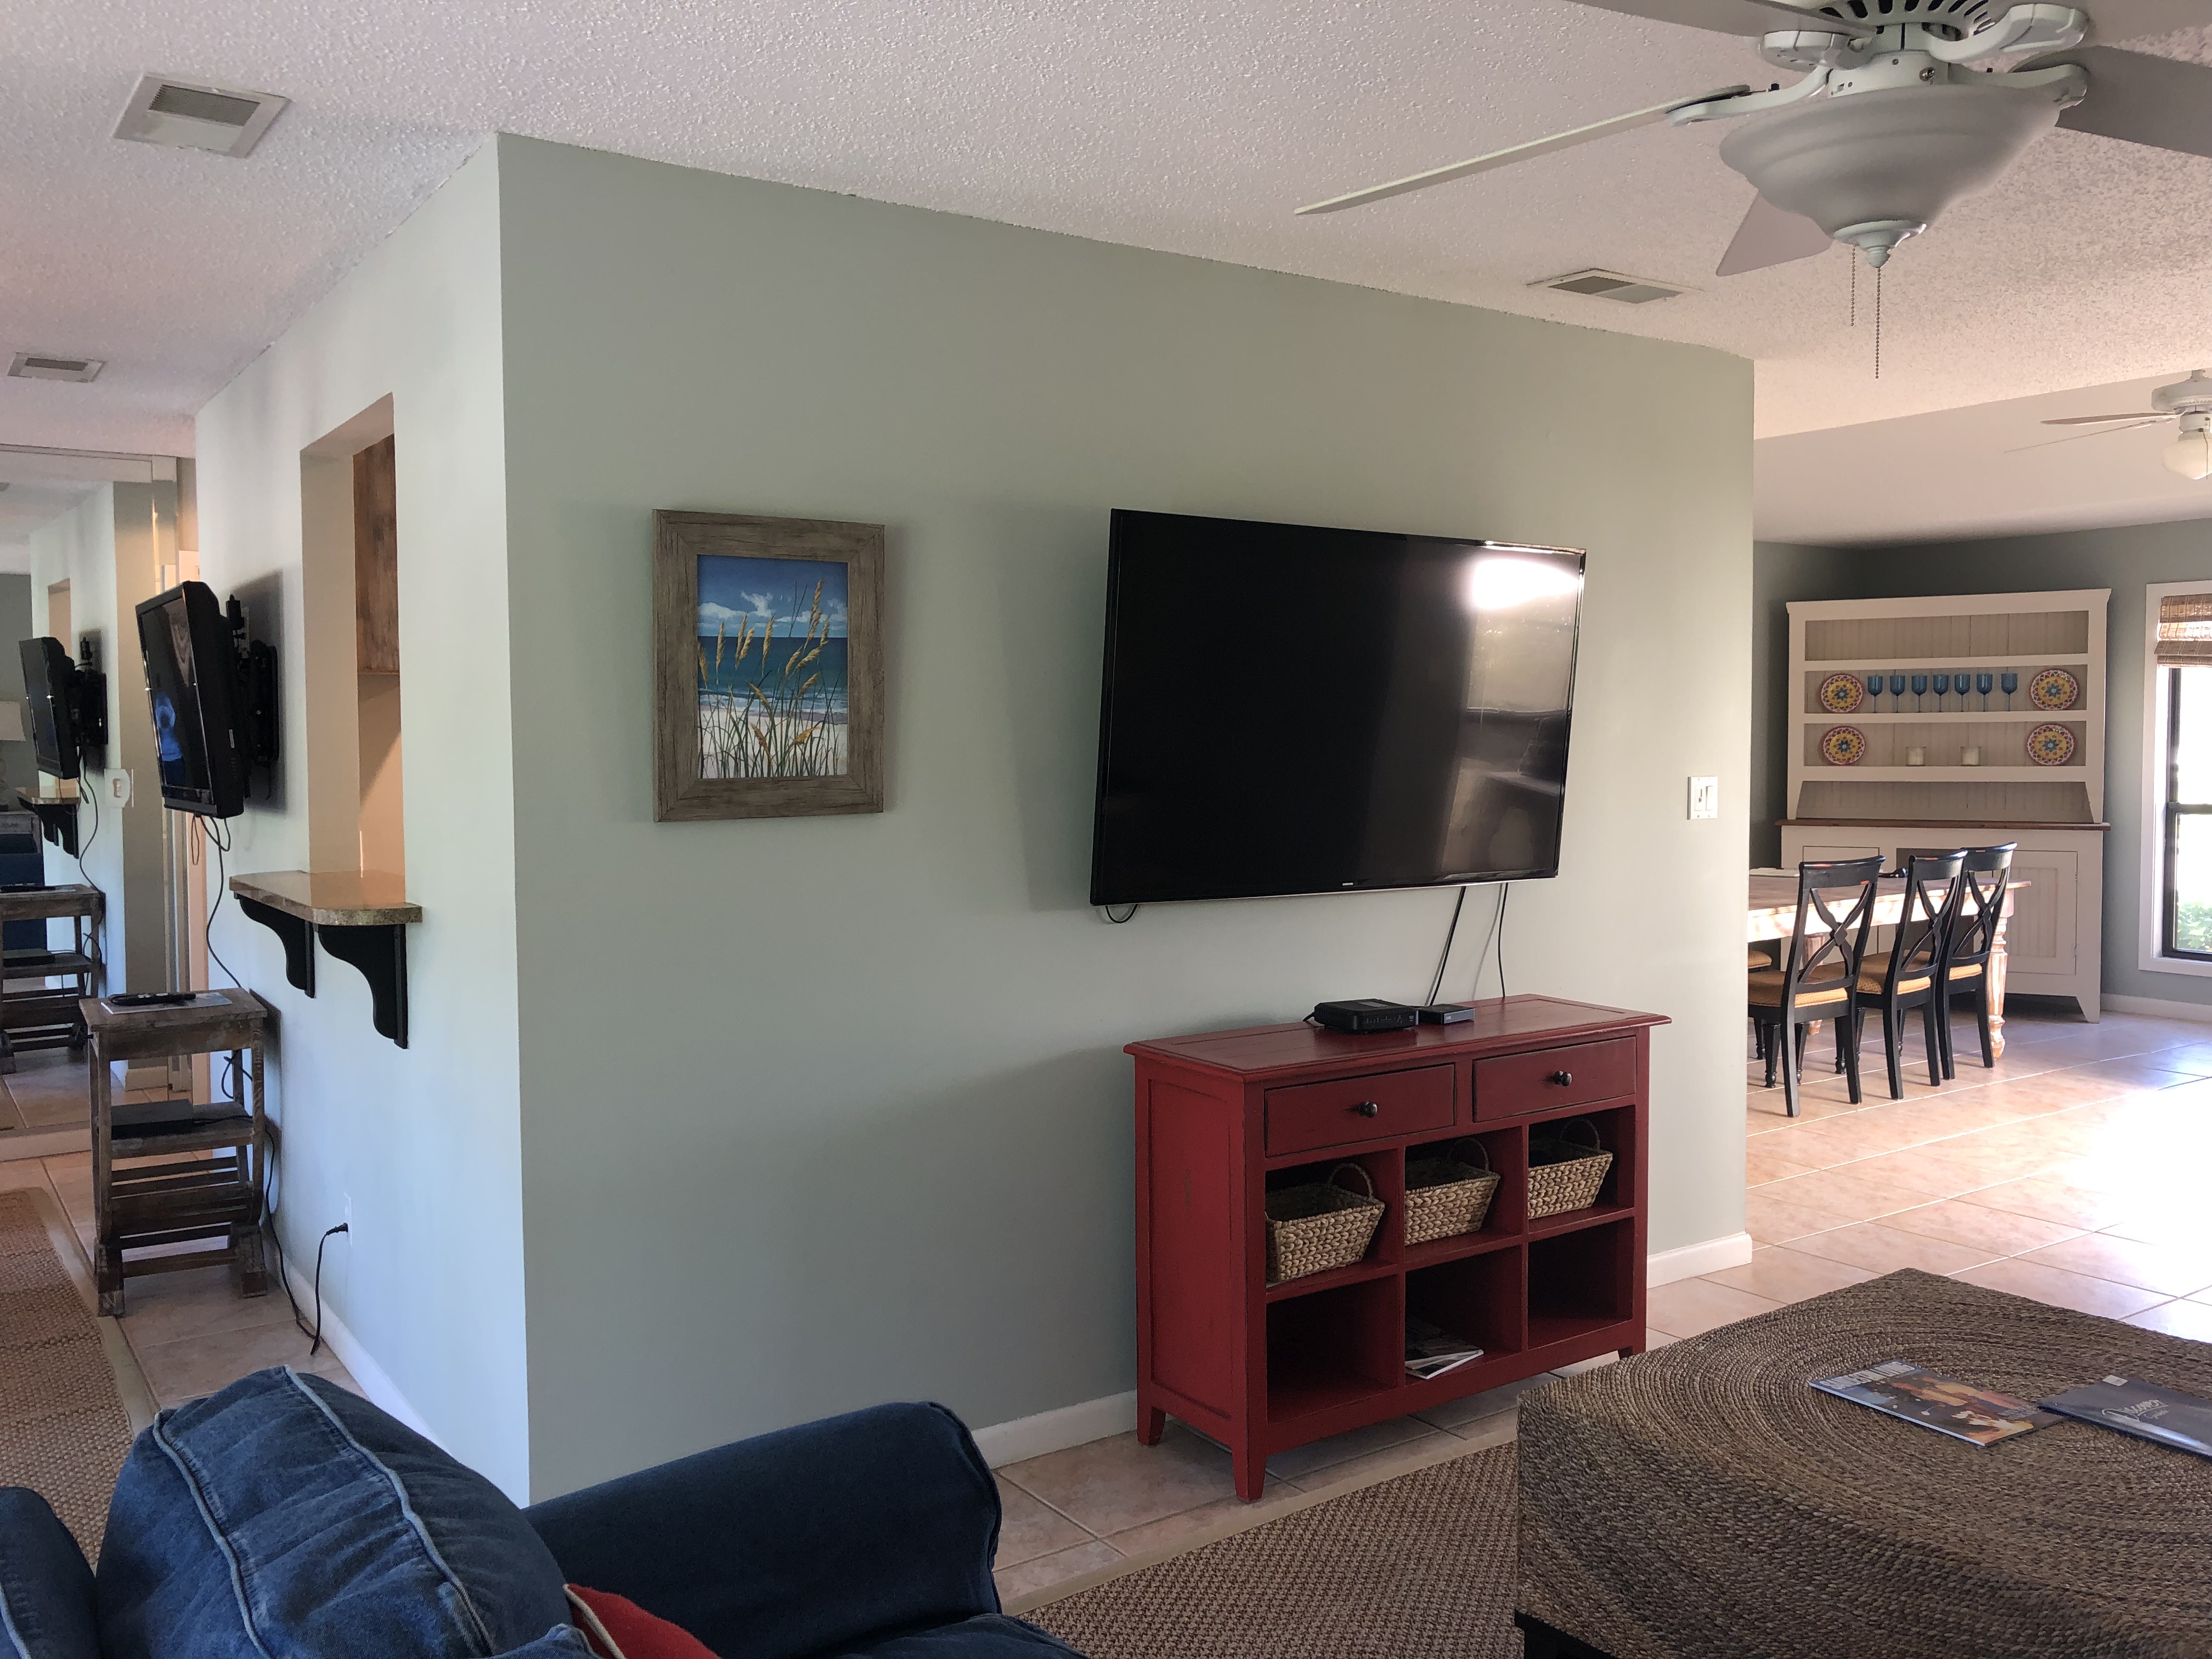
Further into the space and to the left of a wall was a large sofa and love seat with a big TV mounted on the interior wall that backed up to the kitchen – so if you were in the kitchen, you were not able to see the TV, or chat with your guests for that matter.
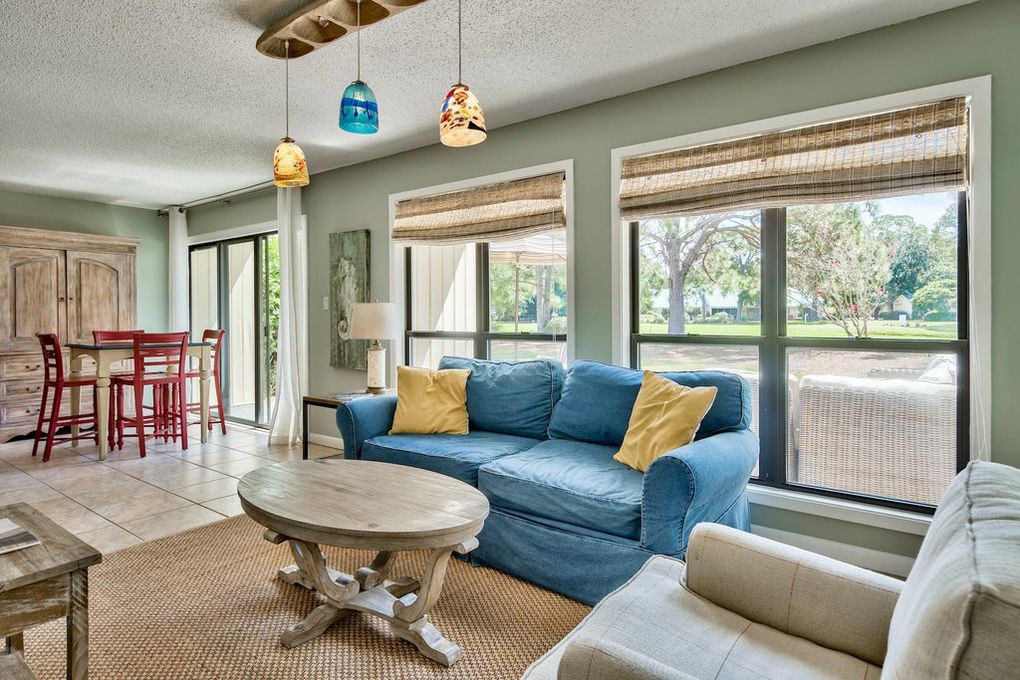
Behind the kitchen against the back of the house was the beautiful large run of windows and a 3-panel doorwall to the left that went out to a large paver patio. Inside, there was another large sofa, a rocker/swivel chair and another smaller TV with dated floor to ceiling mirrors on the back wall.
In my opinion, this this was the best part of the house — and it was completely blocked by the kitchen and the light just dissolved away.
The walkway then went around the back of the kitchen where the hot water heater was stored (yes, next to the kitchen) and hidden behind a door… and then you finished your walk around and you were back at the table near the front door.
It was a big square and I am sure there were plenty of kids at various times that played tag running around the space!
The master bedroom, a good size, held a king size bed with an en suite bathroom. Down the hall from the rest of the house were two other bedrooms (1-king, 1-bunk room) that shared one large bathroom.
I couldn’t get that house out of my mind.
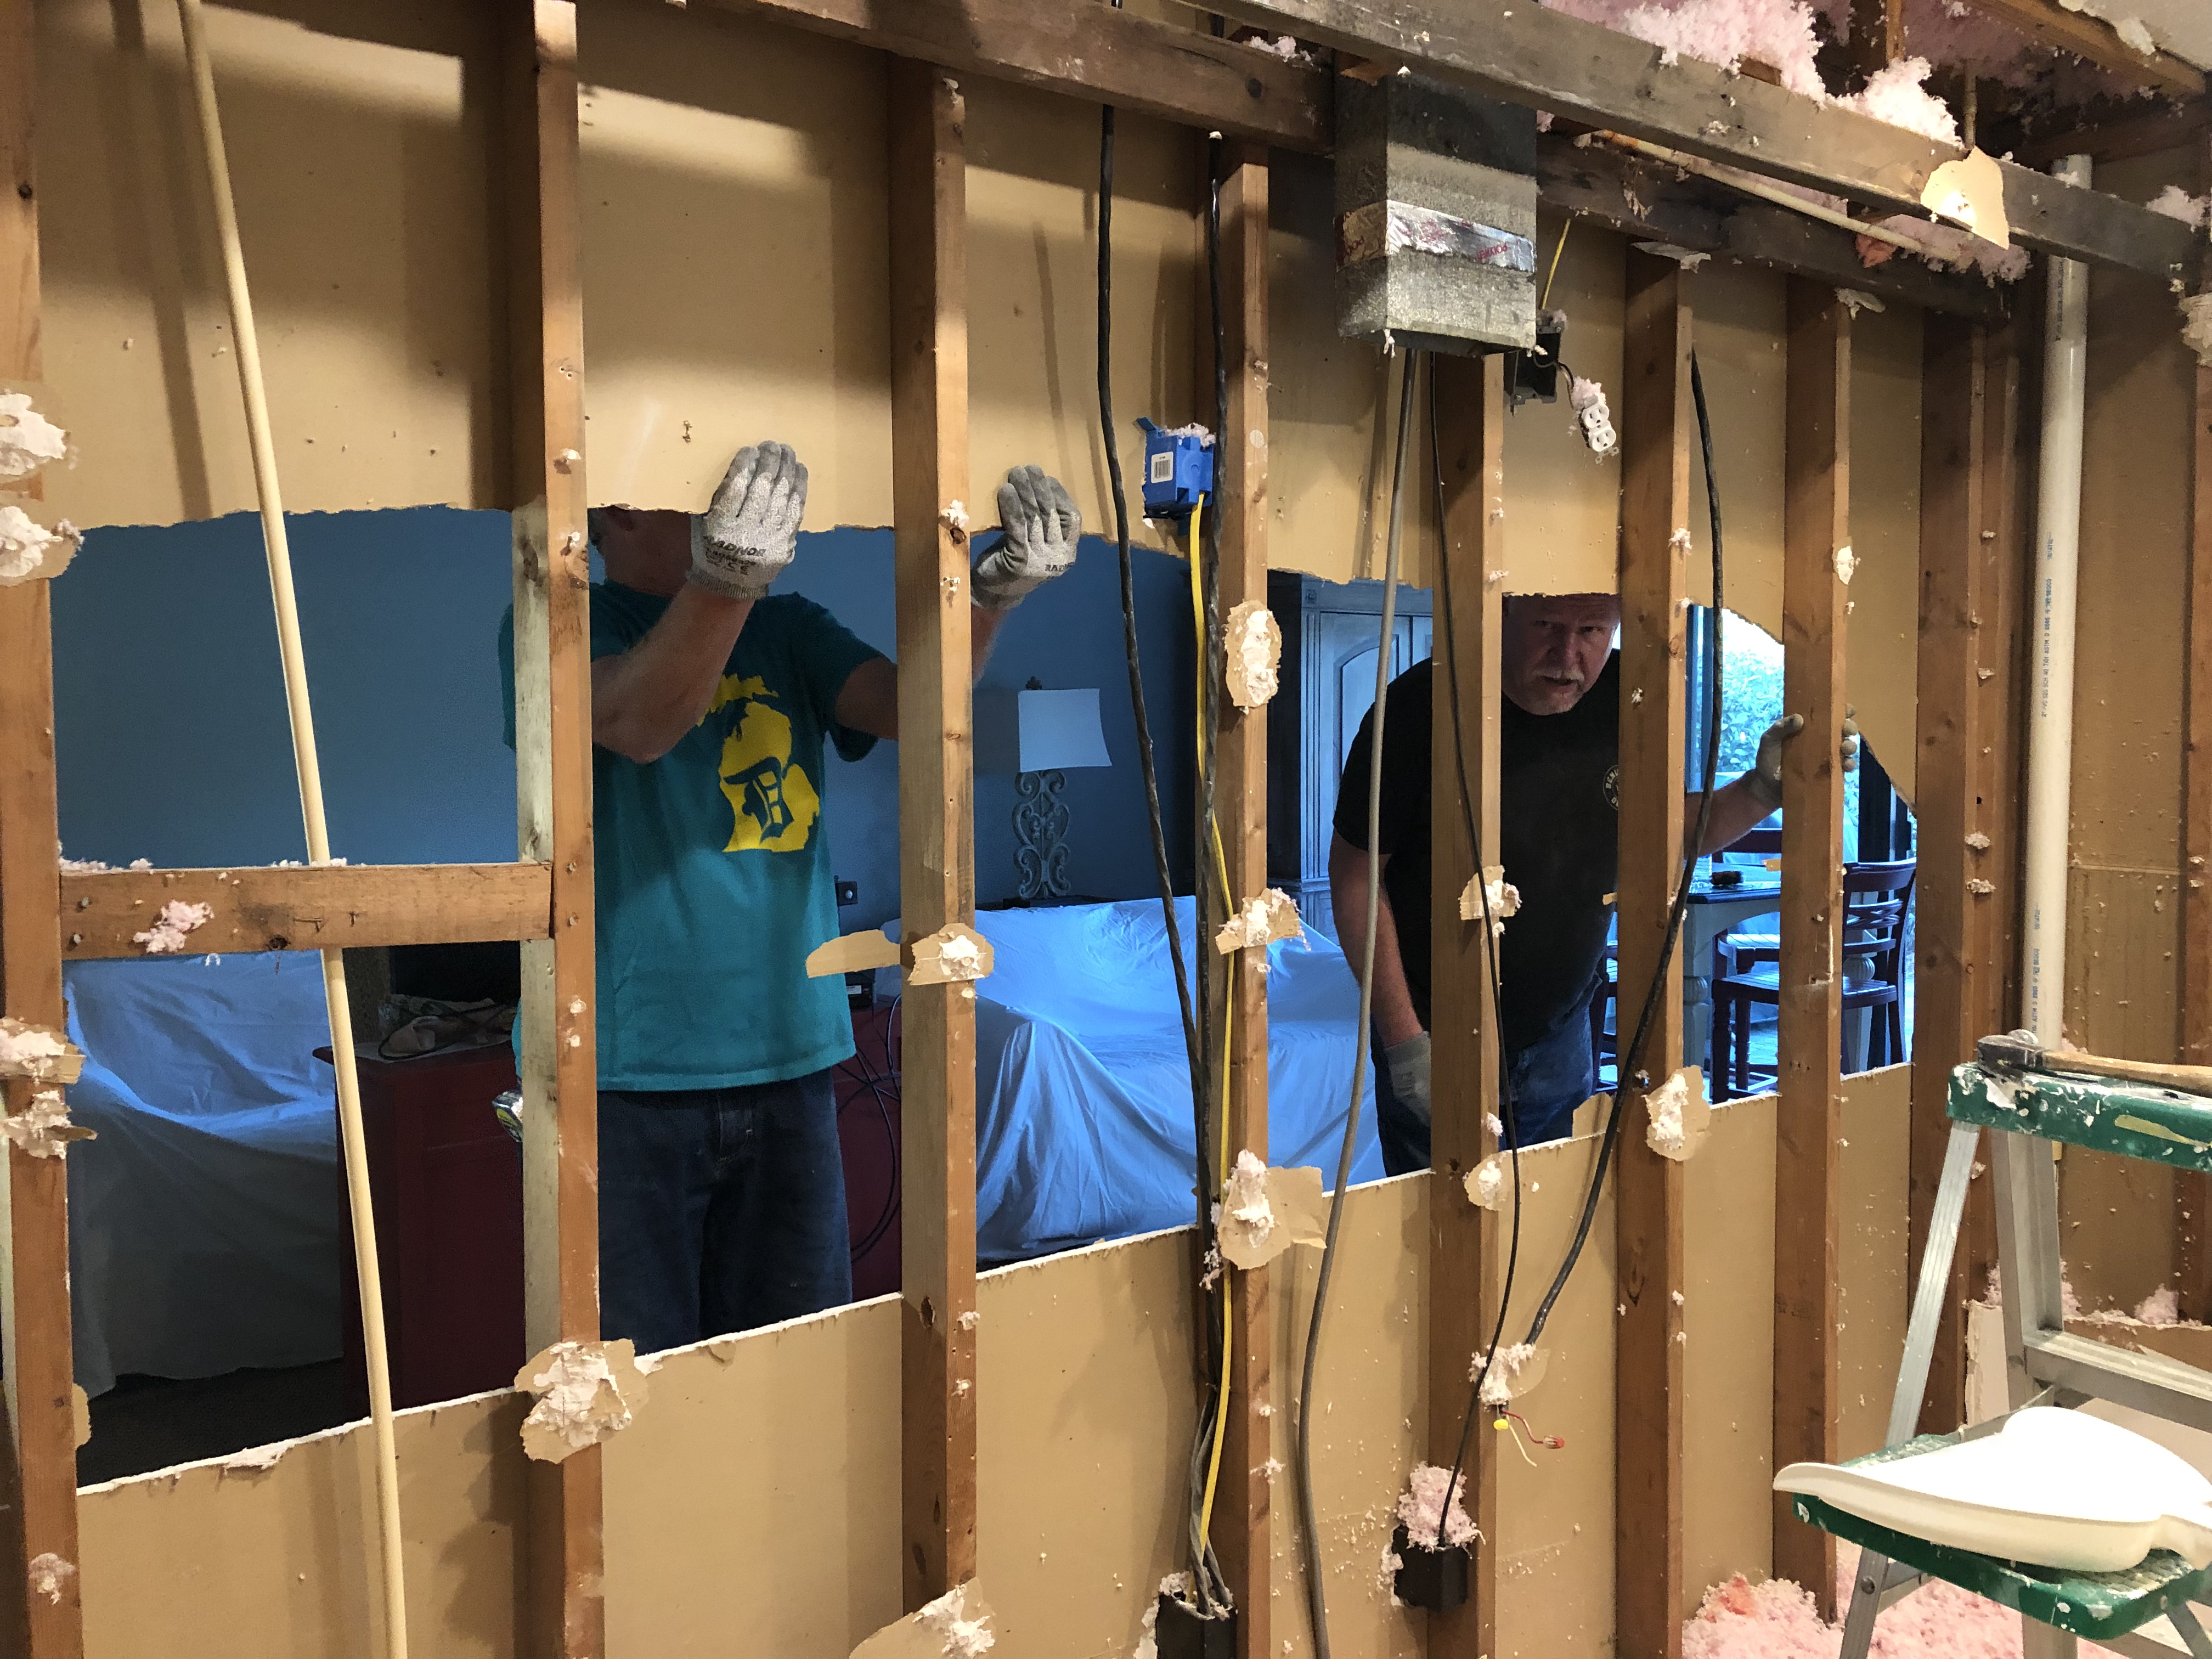
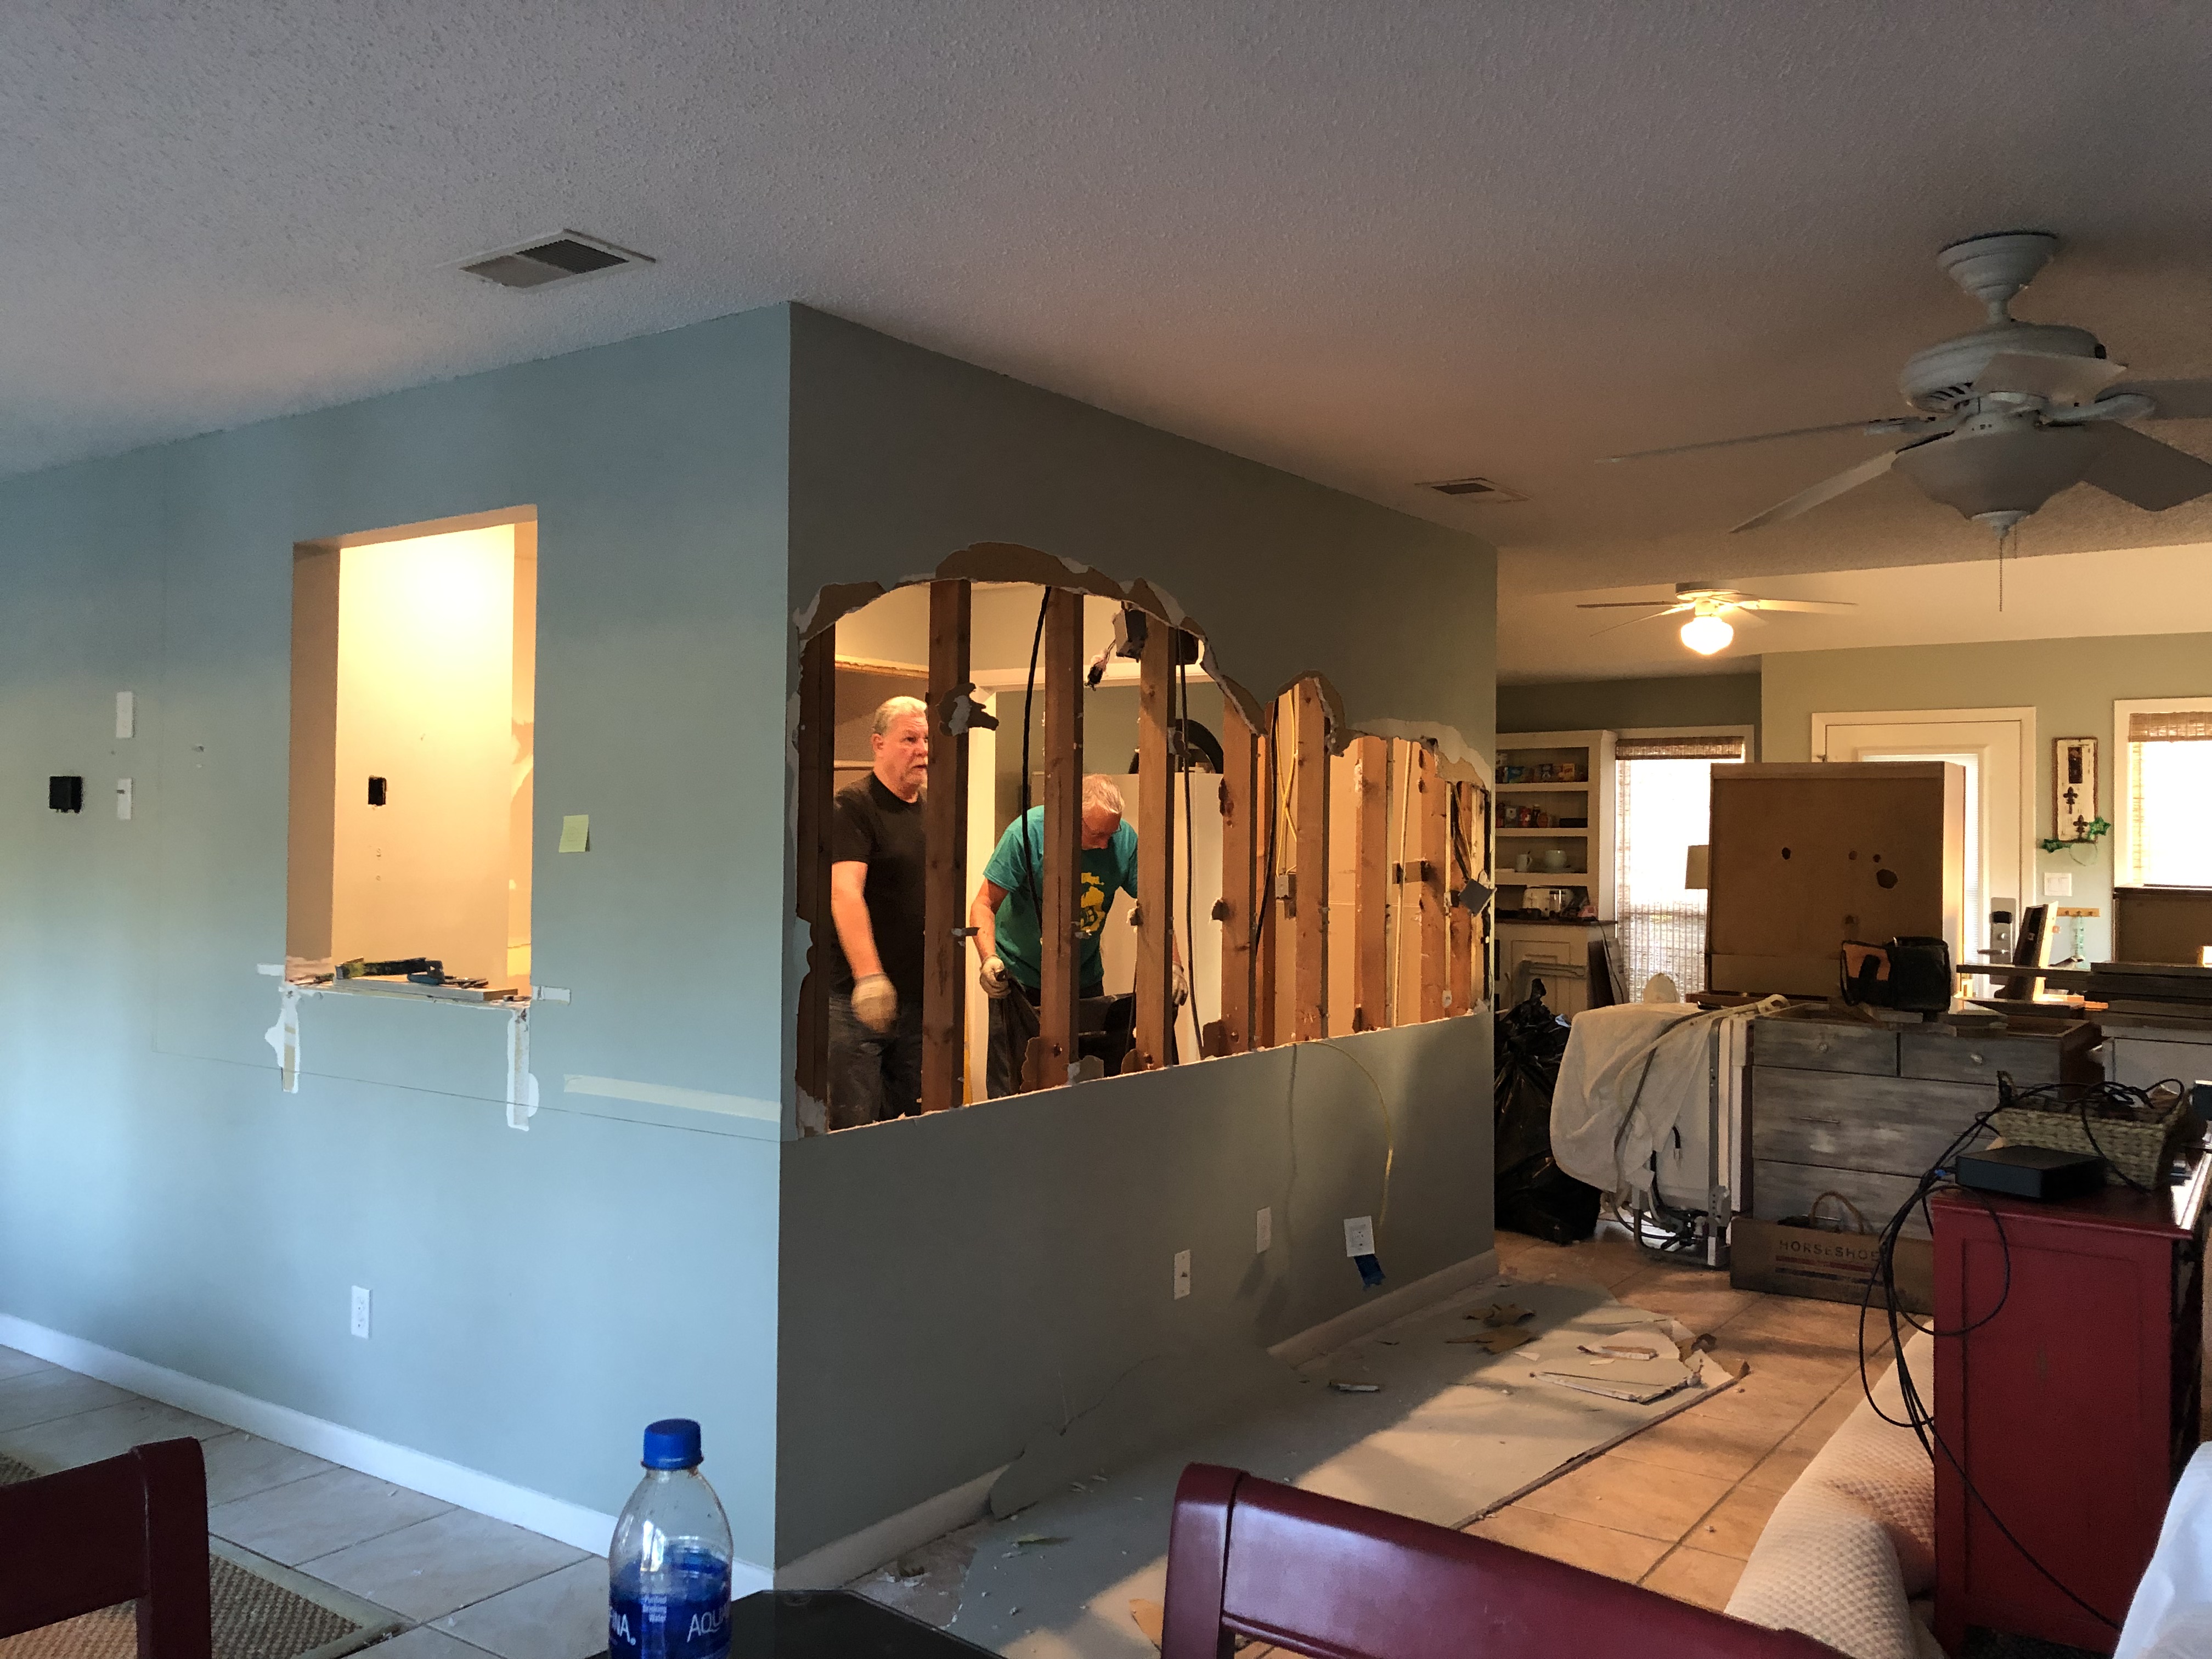
We looked at several houses that weekend, but when I left that house it stuck in my mind. For the next couple of days I was mentally sketching and figuring out what I could do… in the end, the only answer to me was to reconfigure the entire space and take down a wall and completely open up the kitchen.
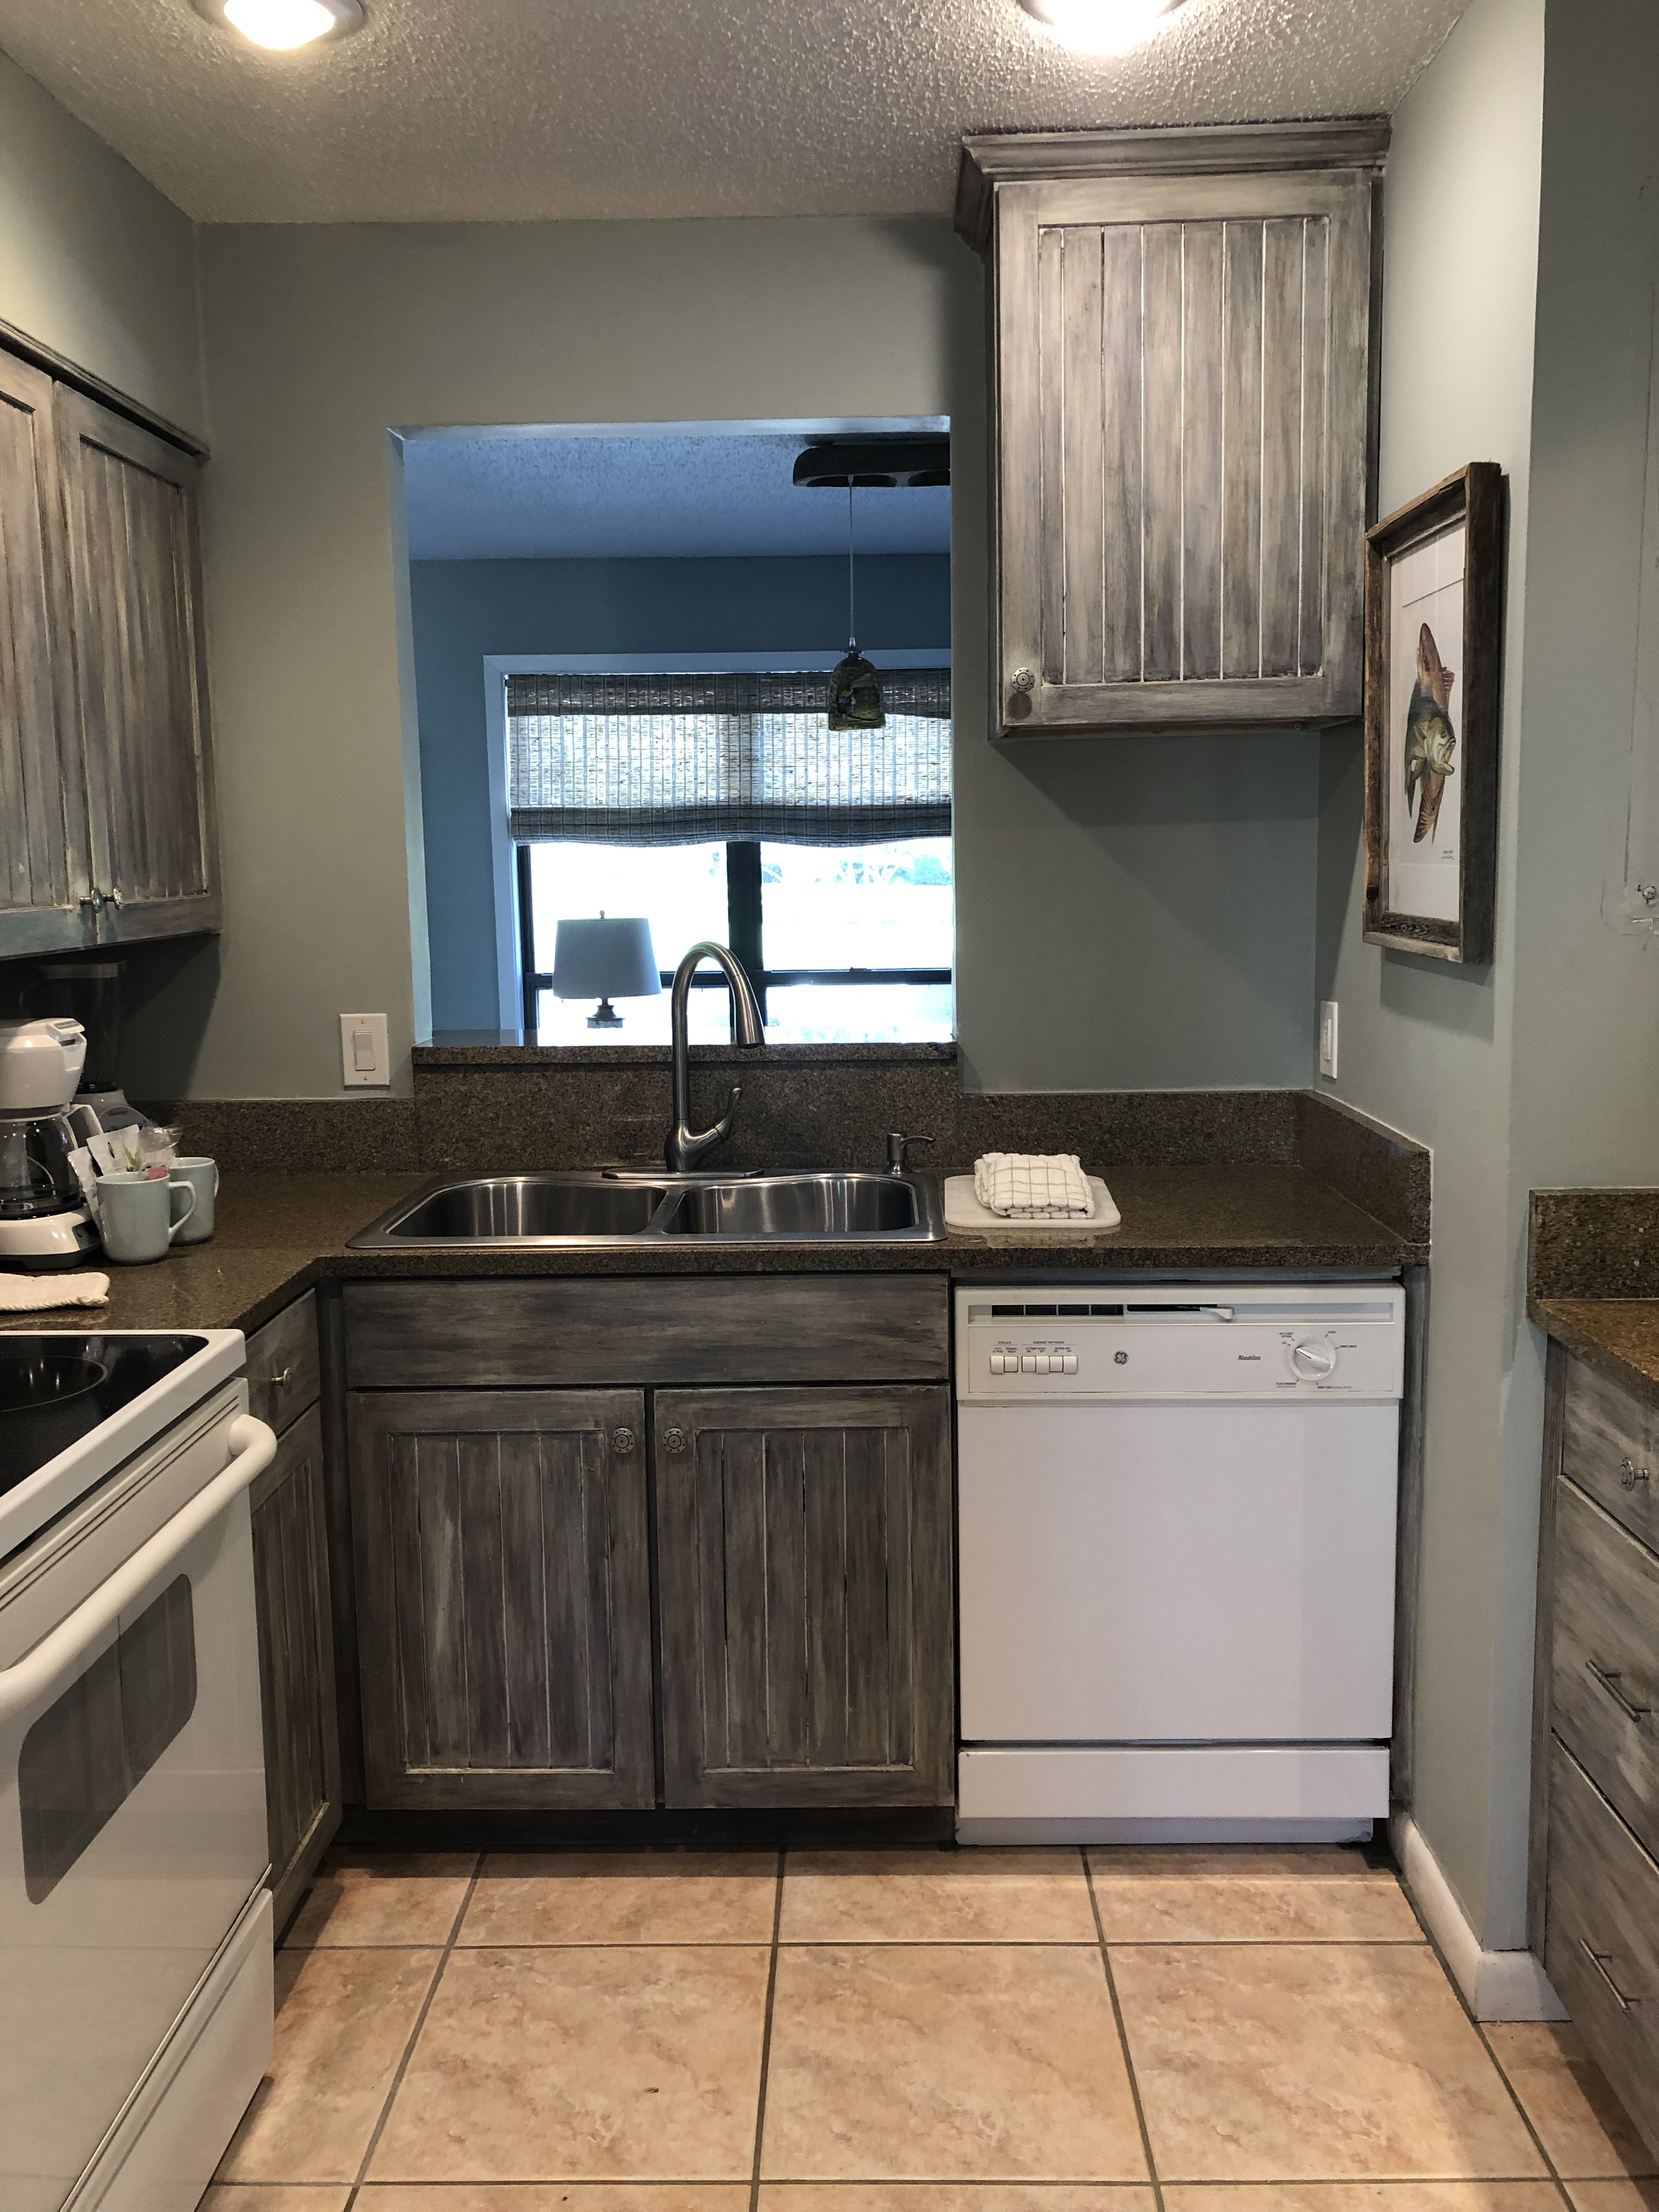
Here are images of the original kitchen with a small pass thru at the back.
What removing the wall would do for the flow of the home would be to connect the kitchen, the heart of the home, with the rest of the space, while retaining some hidden zones for privacy… for example, curling up with a good book or having smaller group conversation.
I definitely felt that I could expose all of the hidden potential and it would be a lovely home, if I could just fix it. So all things considered, we decided to move forward with the house – even with all of the unknowns.
My previous experience told me that this would be a real challenge as this 1976 year old home would likely have hidden challenges behind the walls… but “how bad could it be?”
It was bad.
During the inspection process I became an expert in electrical wiring (well not really, but enough to be dangerous). The house was built in 1976 with single-strand aluminum wiring. I knew this as the inspection report strongly emphasized it and two other electricians confirmed it. Single-strand aluminum was the standard at that time due to the cost of copper and was considered satisfactory and Code for this time.
Since the early 80s copper has been the standard, but in the end, I was assured that the single strand aluminum wiring would be safe as long as the purple ground caps were on the connections at the outlet boxes. In addition, I knew that most if not all of the wiring would need to be replaced to Code in the kitchen with new appliances and power requirements, so everything that was touched was converted to copper throughout the project. That was an expected hit, but still not fun to absorb.
What I didn’t anticipate was a labyrinth of wiring and plumbing that encased the Kitchen “box” space. My original design plan called for taking down to countertop level the 14 foot main wall that cut off the kitchen, as well as the bookend walls on both sides. It would limit my storage, but I had a back up storage plan for small appliances. I had to make a choice about closing up part of a wall, or replumb and rewire a complicated space. I chose to close up 30 inches to the right of the sink as the cost-benefit just wasn’t there.
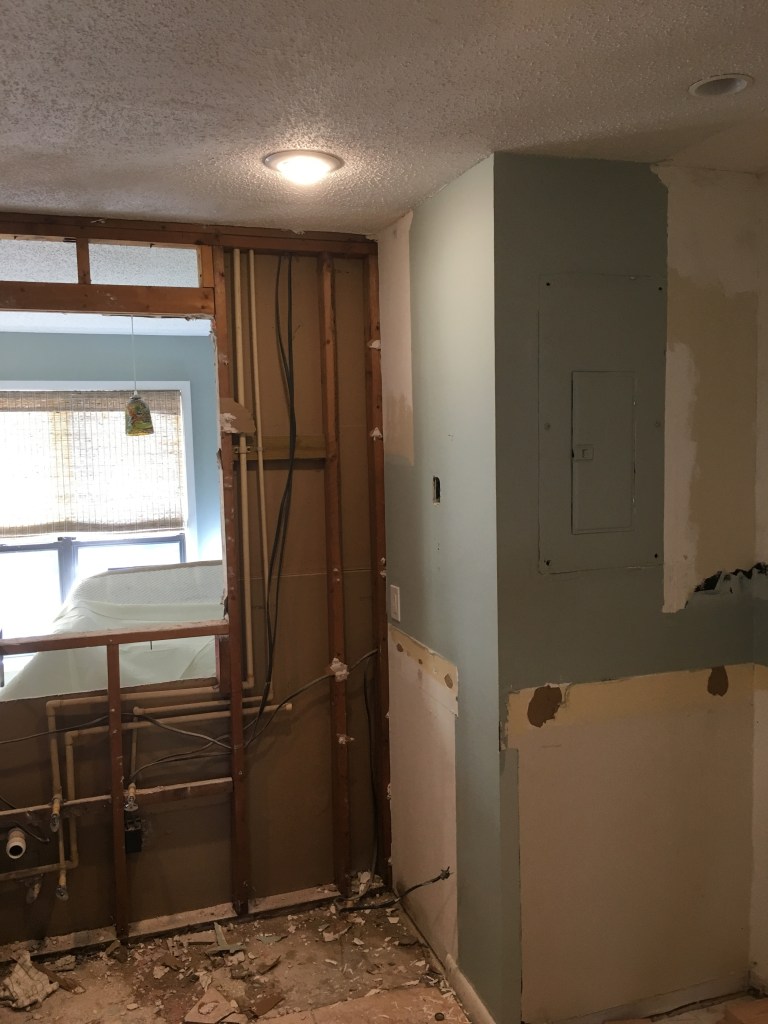
Hidden wiring and plumbing 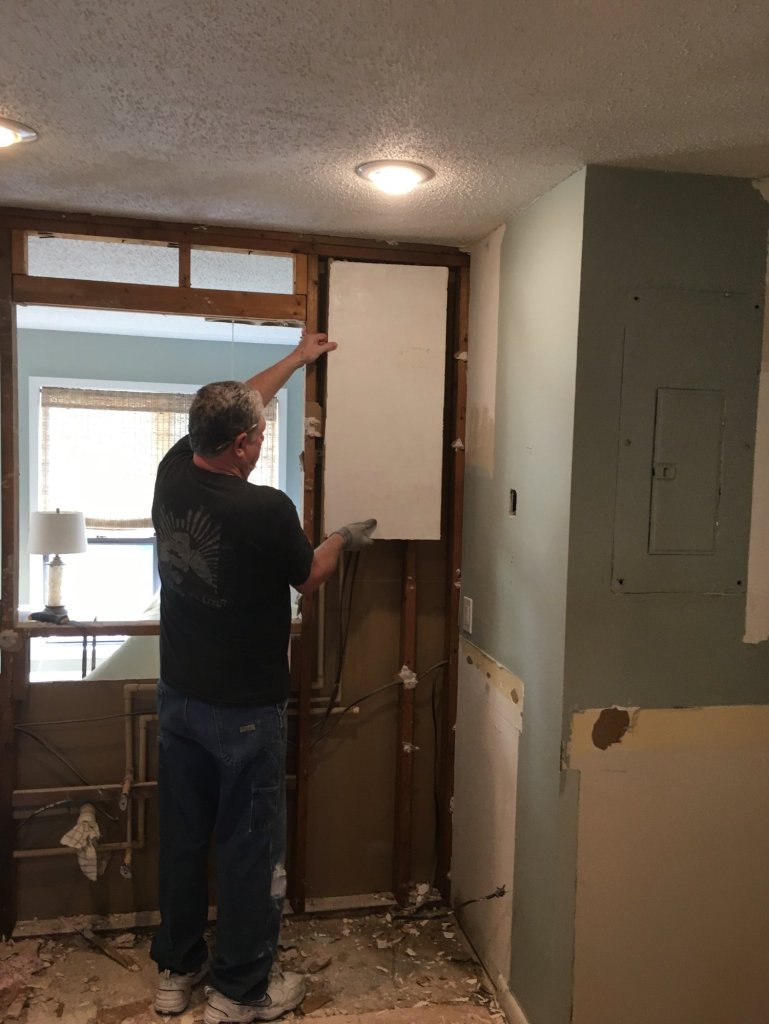
Placeholder to add 42″ cabinet since the wall would stay
In the end, it actually paid off and didn’t affect the overall flow as it allowed us to add a 42” cabinet above for storage as well as retain the smaller TV on the opposite side for what I would eventually call “the Lounge”.
Opening up the space.
Some good news was that I learned from a local contractor that these homes were originally constructed offsite, including the truss roof sections, and trucked to the site – therefore the roof was separate from the first floor build. The joists ran parallel with the kitchen wall that I wanted to remove, so instead of a load-bearing wall which would force me into a beam or a less-expensive cased opening, I was able to remove it entirely. It was a fun demo to be a part of and everything went well… whew!

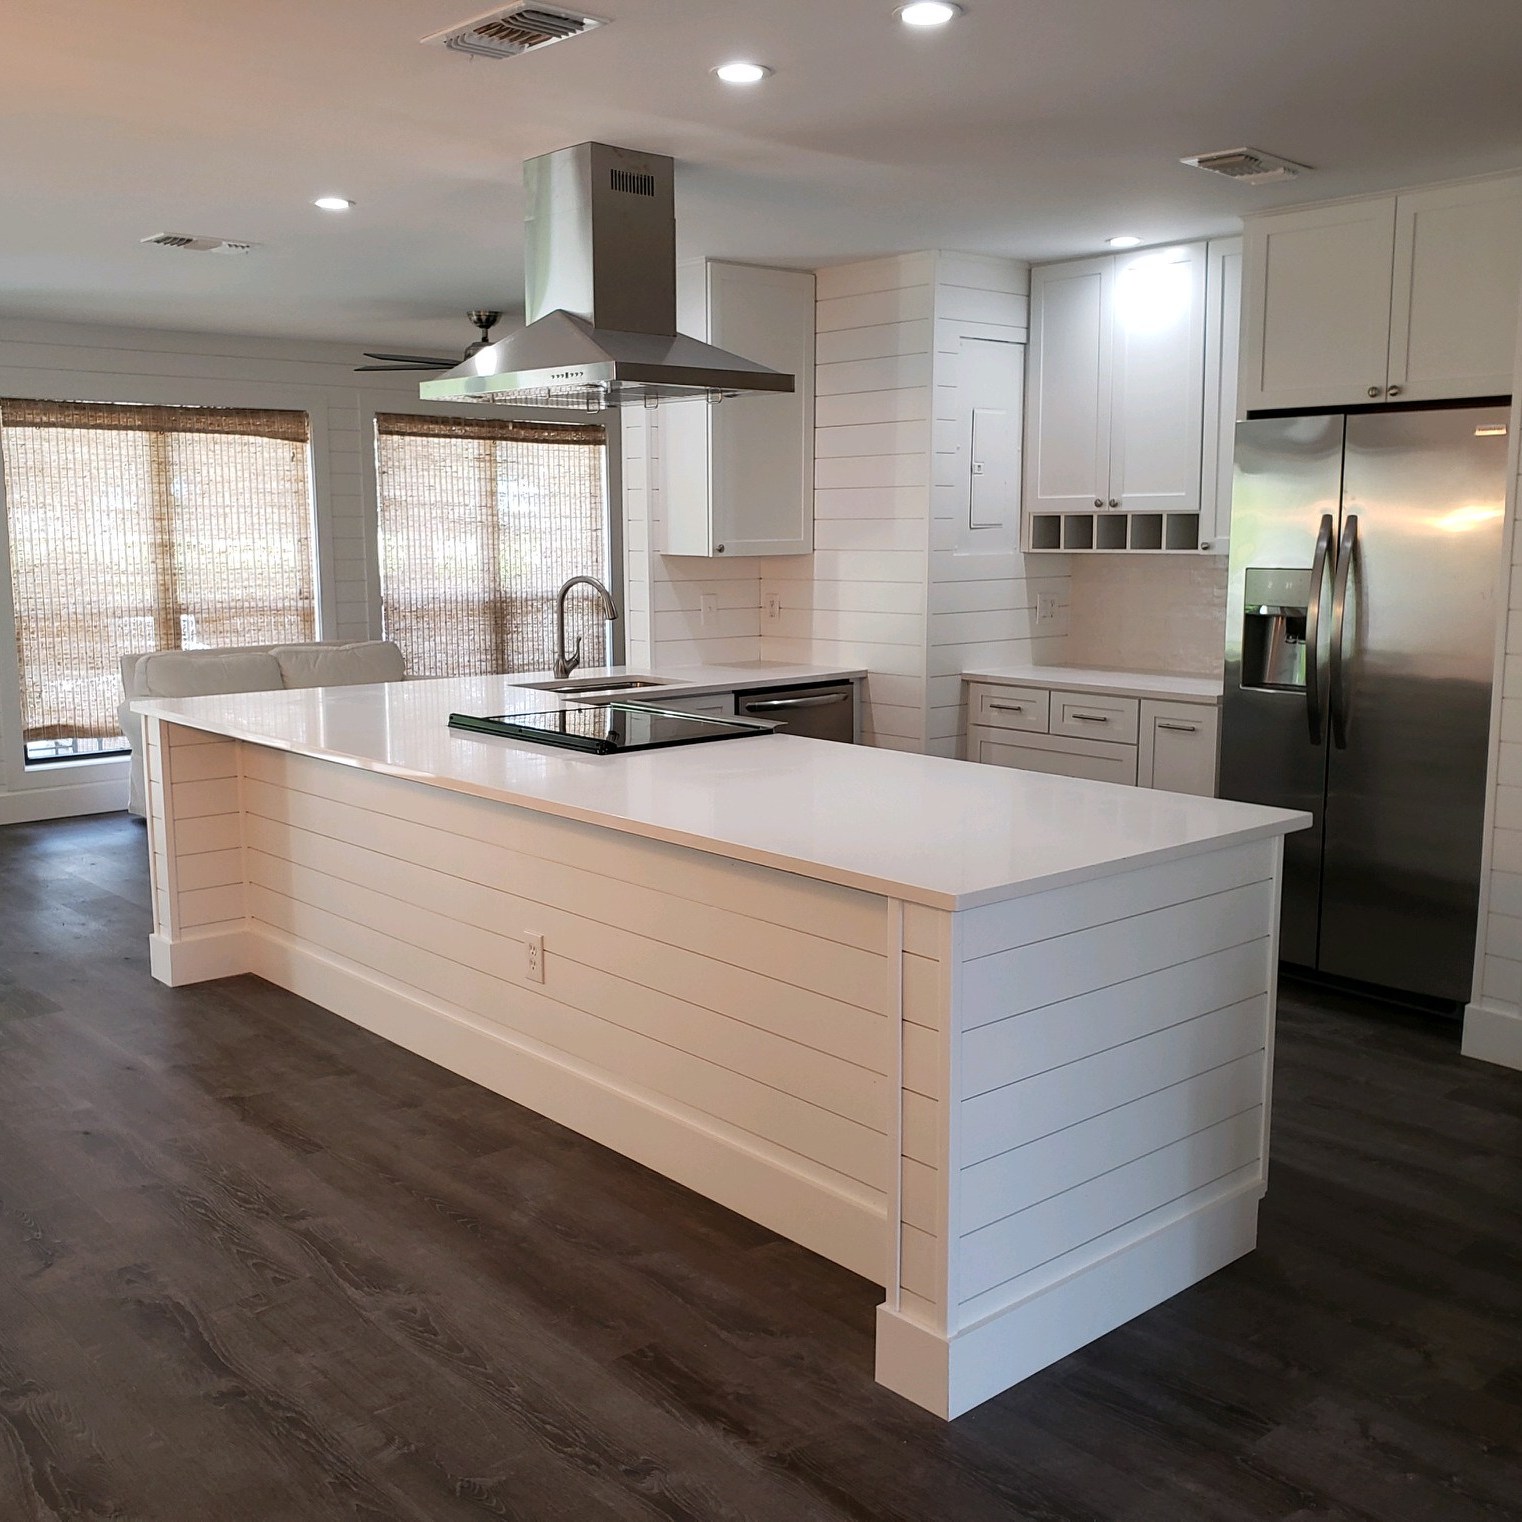
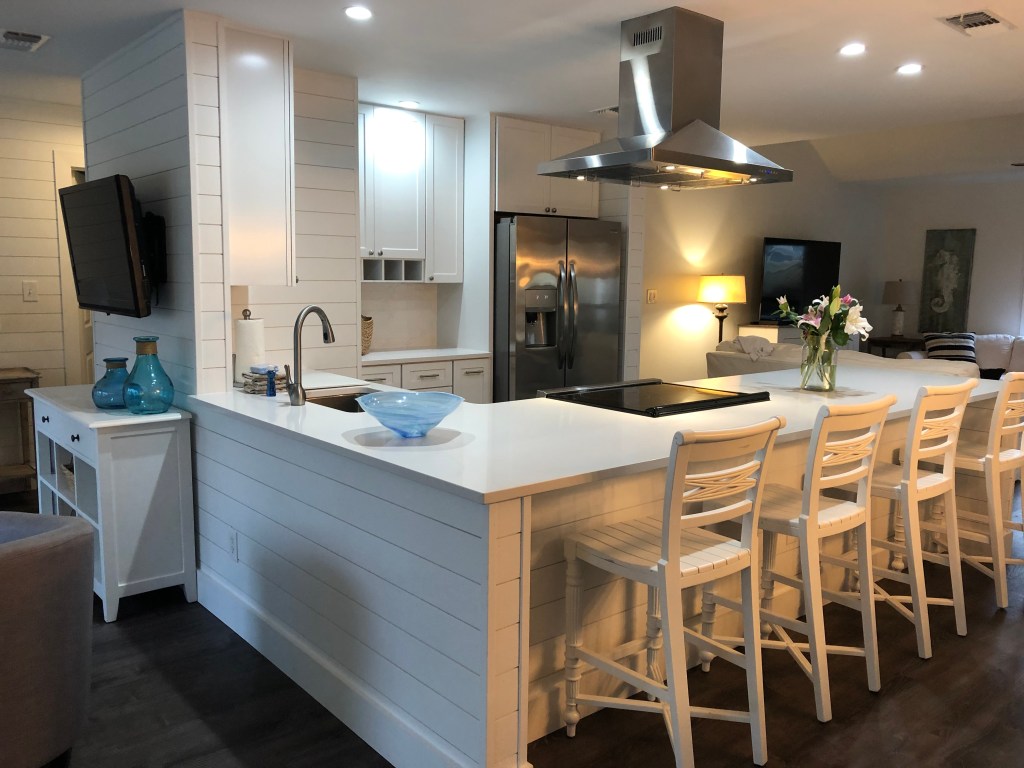
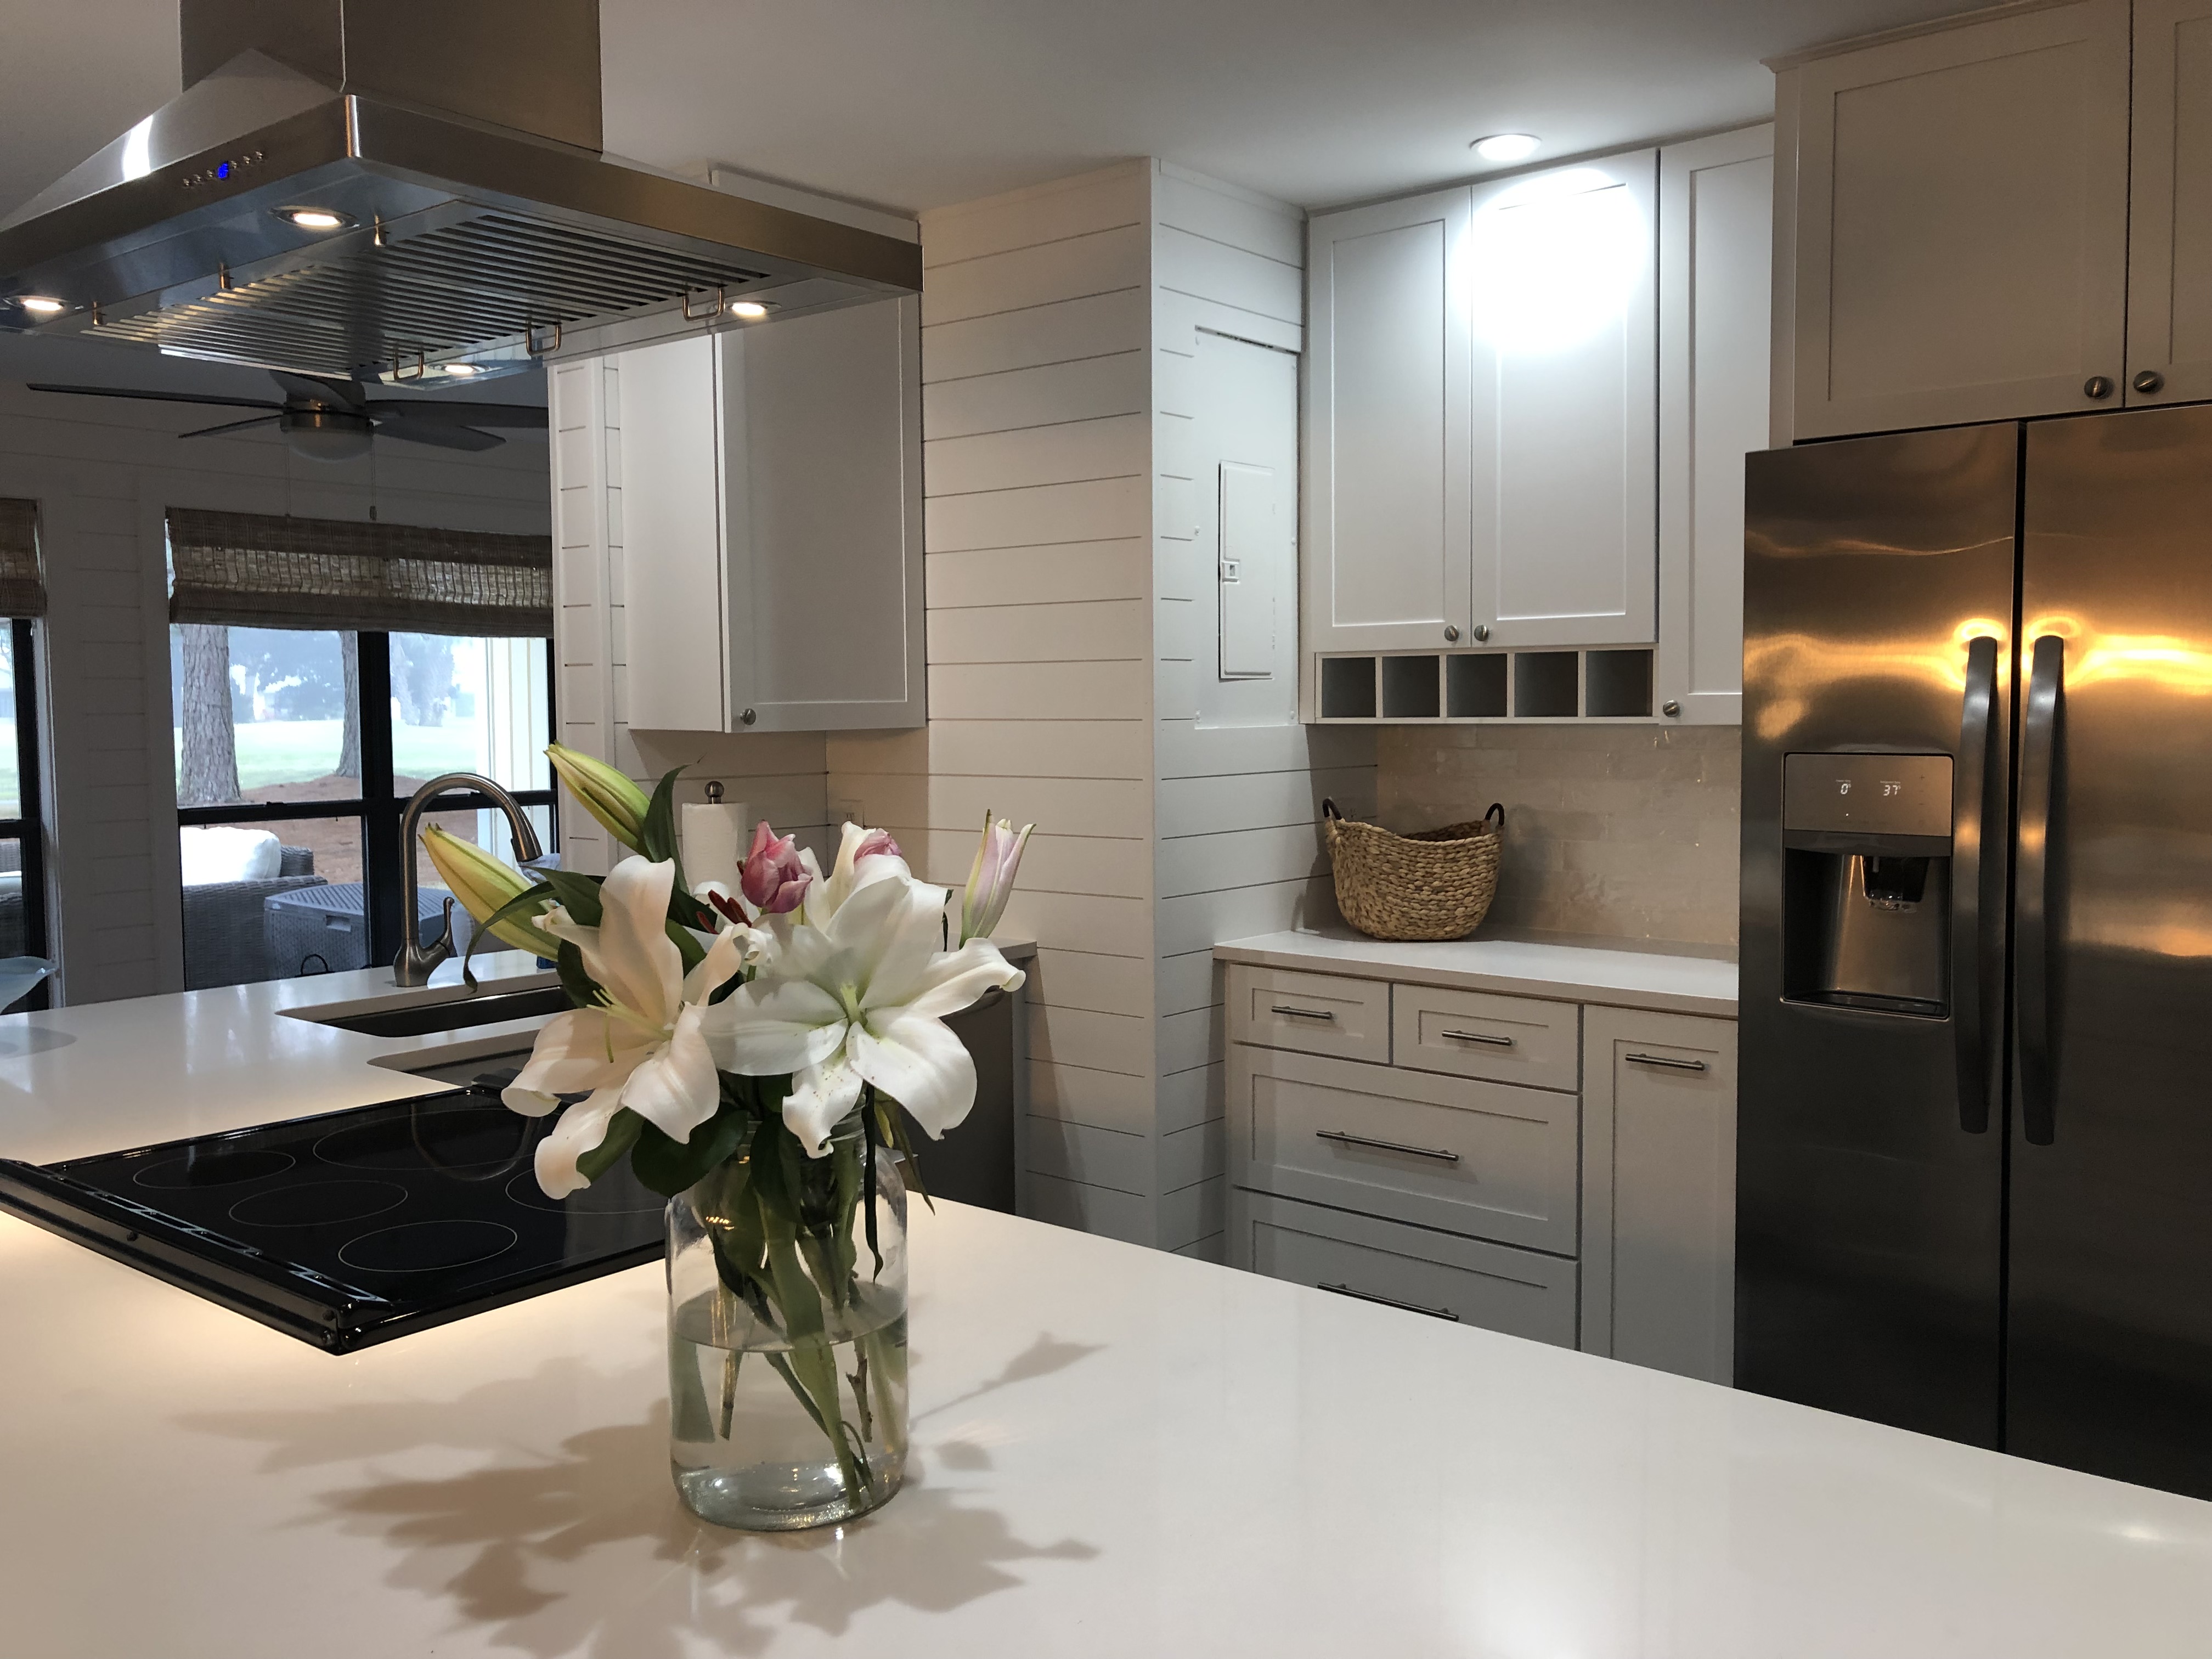
Here’s the final rendering and the completed kitchen without decor…

Just-In-Time Project Management
After the demo was done, we donated all of the old Kraft Maid cabinets and appliances to Habitat for Humanity – everything except the kitchen sink faucet – a gooseneck brushed stainless faucet that was in great shape and fits in well.
As for appliances, I went with Frigidaire – it was that or GE… I wanted to support American companies. With such a tight timeframe to flip this vacation house, the Frigidaire appliances were the best and more affordable choice and importantly, available. Under normal circumstances I would have ordered appliances way in advance to ensure their delivery – but this was a “just-in-time” approach because we didn’t have a garage or a carport at the house. Everything had to be staged inside, which was problematic at times.
The entire project management of this vacation flip was really challenging – not just because I was doing it mostly remotely, but the guys were working and moving stuff as they went. I had to pay a premium to get materials shipped in when they were ready for them, so they were there a day or two before they were ready to install. It was a challenge for sure as the hood vent came in damaged, and there was a mix up with the kitchen cabinets. These two issues set the guys back a few days, but in the end, it all worked out.
Trending Classic White
I selected white Kraft Maid Ever Core wood cabinets as white is on-trend and classic. I purchased Ever Core cabinets as they are made for the humidity of Florida and are considered more durable. As for the countertops, I went with an Arctic White Silestone quartz product from Florida Kitchen & Bath. With cost challenges, I went with the least expensive, most durable option, but in the end I truly loved the choice.
Most of what I purchased for the house came from Home Depot, but with the short turnaround time, Florida Kitchen & Bath committed from measuring to installation, in roughly 5-7 days – which is unheard of.
In Santa Rosa Beach, Florida Kitchen & Bath have a large facility with the ability to fabricate everything onsite. Just 5 miles down the road from me, I was in their showroom getting a bit overwhelmed with so many choices. In the end, I purchased the countertops, and the entire tile for the house through them.
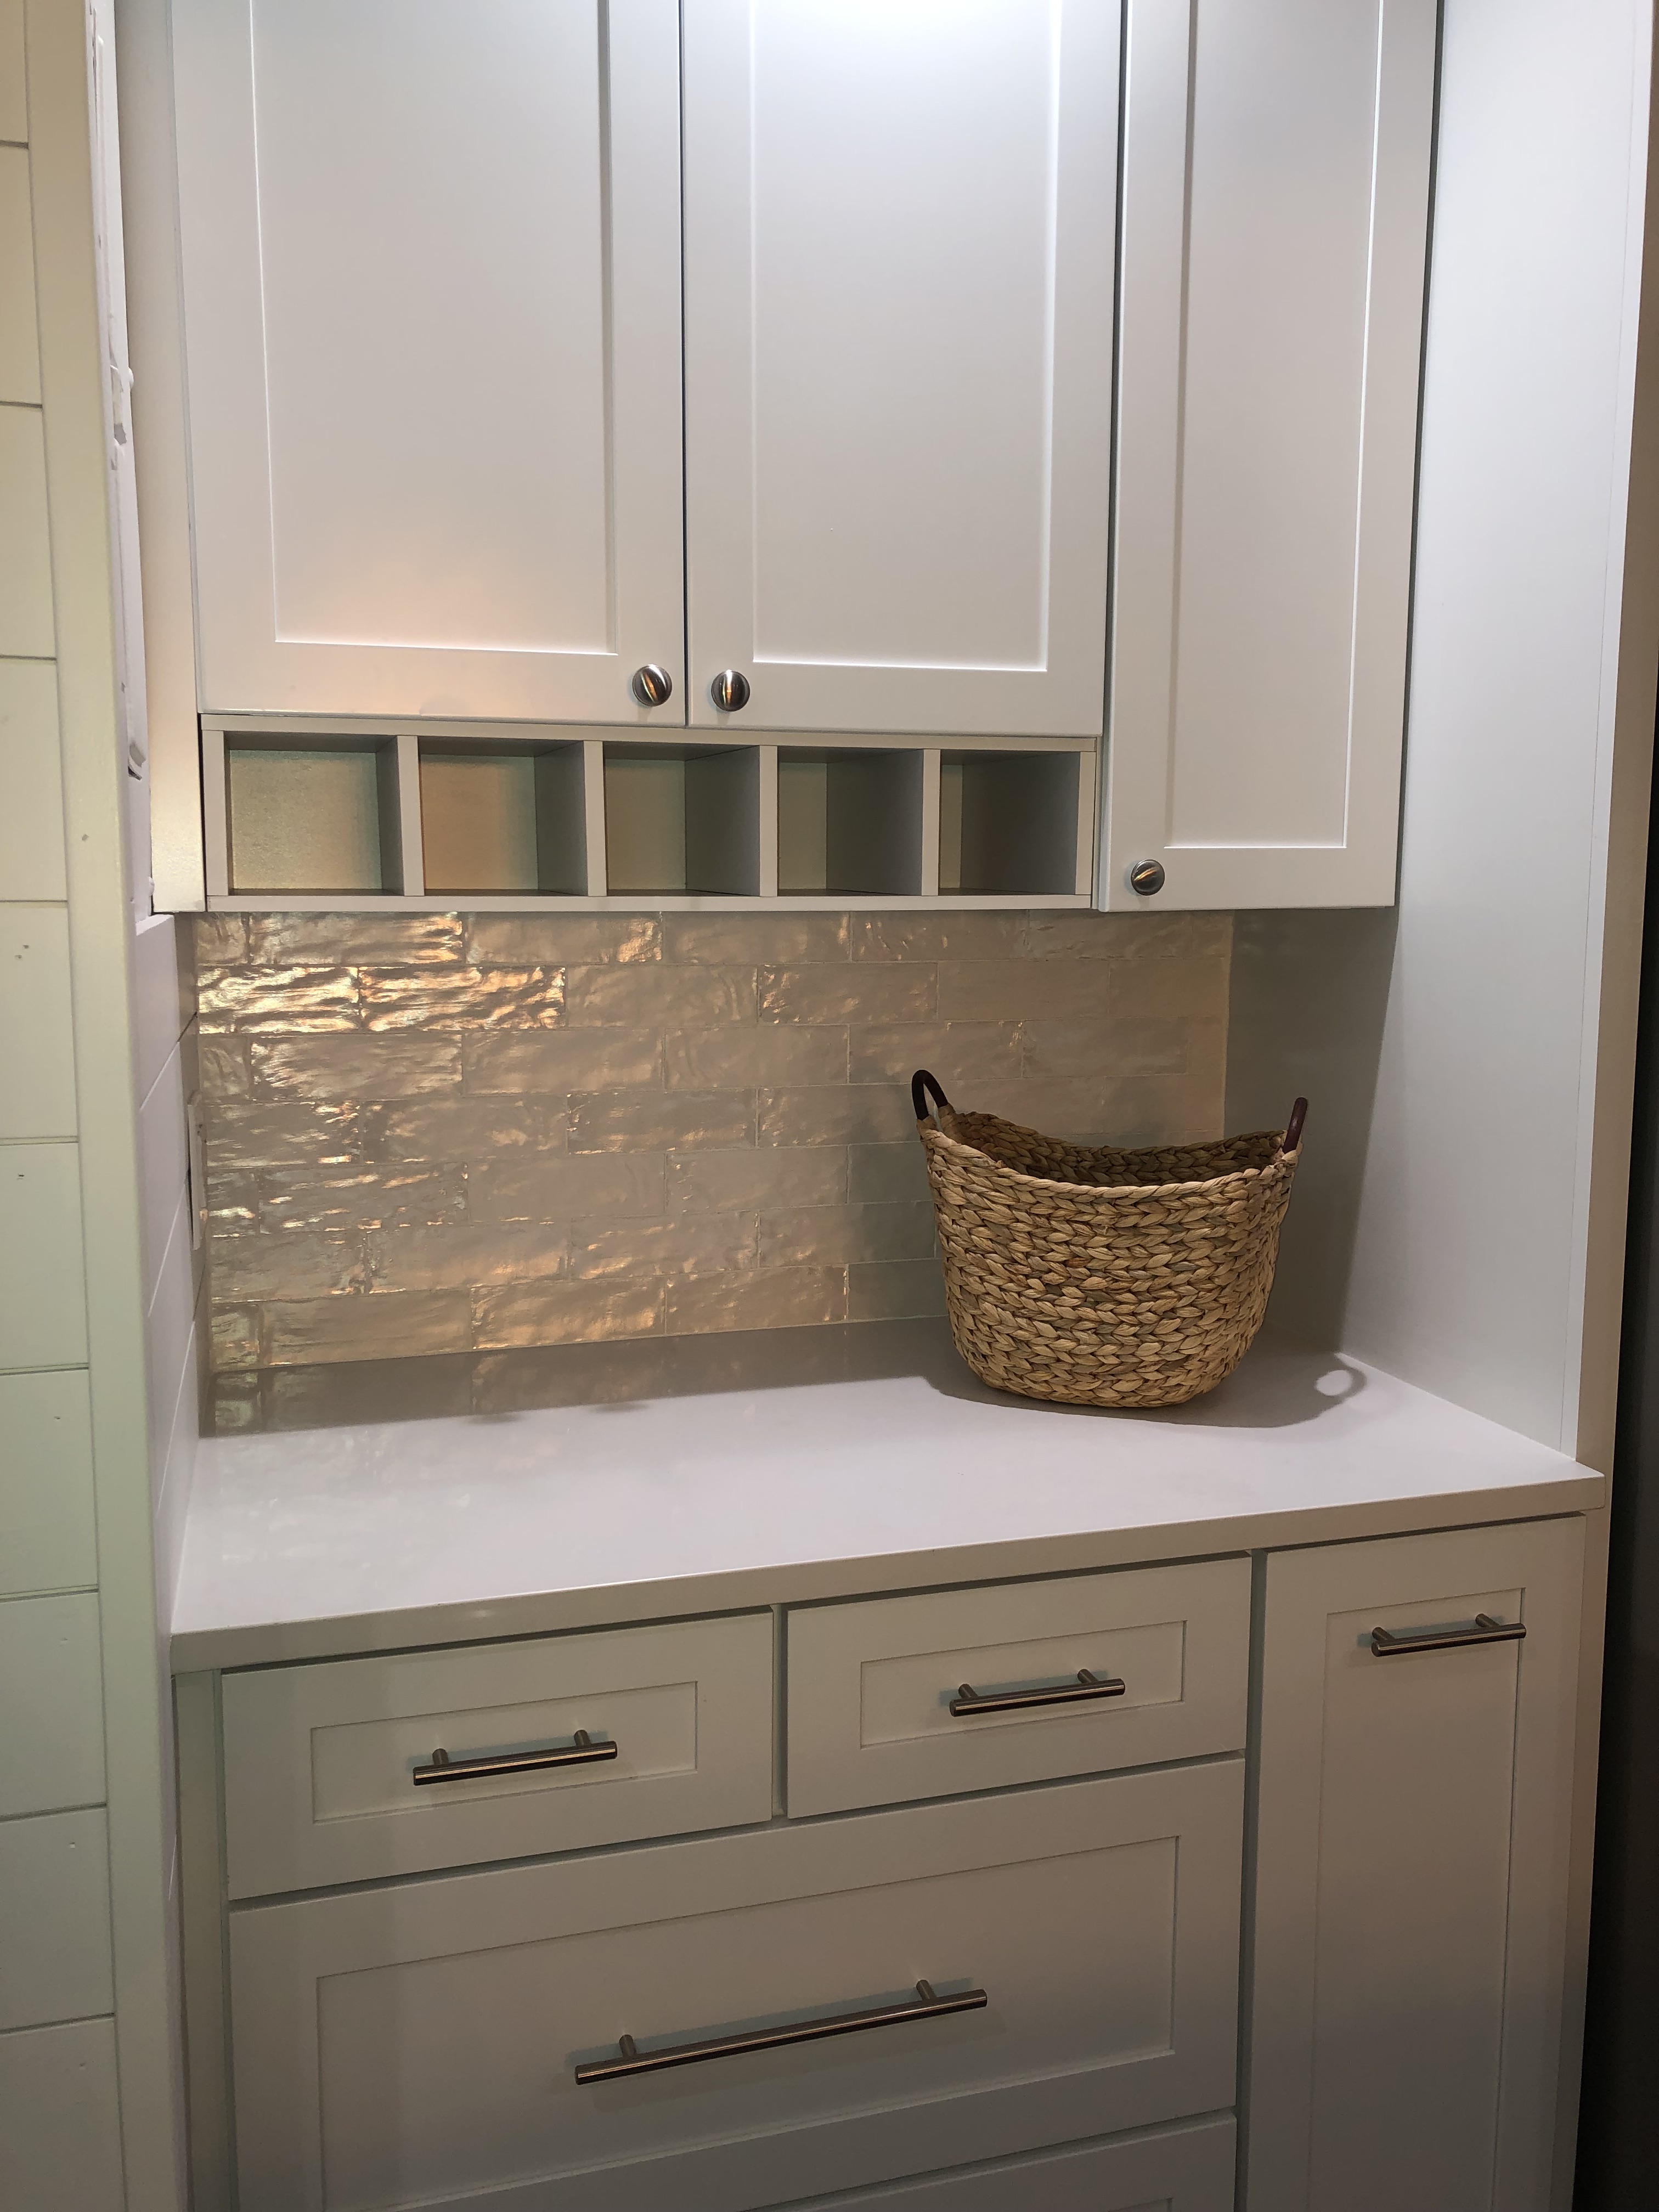
I adore the kitchen backsplash – it is a small area that makes a huge impact with the bounce of the light off of the iridescent glaze. And the countertops look seamless and beautiful… I learned that the installer spent an hour working on getting the seam just right – I so appreciate the workmanship throughout the house that makes it so special to me.
In the end, the goal was about opening up the space and enveloping it with light. There is more to share within this space – tackling the ceilings, shiplap walls, base and flooring… so look for that next time!
All in all, I am very, very happy with how the reconfiguration of a dated floor plan that didn’t invite conversation and community, was transformed into a large open floor plan with lots of light. And in the end, it gave a renewed freshness to Coastal Magnolia — our beach-meets-farmhouse home.
Here’s the link to the house:
https://www.myvacationhaven.com/vacation-rentals/properties/sandpiper-village-716-g/

